If you use templates or foundation when you quilt, understanding proper copying and printing is extremely important. It can mean the difference between correctly sized blocks or frustration. The first step is to understand why printers and copiers don’t print to size. Generally, the change in size has to do with margins. The devices usually have 1/4-inch margin (or thereabouts) around the page. Therefore, the device is typically programmed to shrink the document, to ensure it will fit within those margins when printed. Therefore, you will need to adjust to account for that margin.
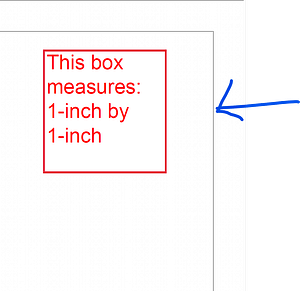
The second thing to understand the registration marks on the pattern. For paper patterns, you may need to make additional copies for your own use (not for other), as you may for foundation piecing. A good pattern has key or registration mark, which you can measure for verification. For example, “This box measures 1-inch by 1-inch”. That may seem like the only mark you need, but you need to be a little careful. Just like with any measurement, are you using the inside of the line, the outside of the line or somewhere in between? I typically use the outside of the line as it is conservative. The most important point is that you are consistent in how you measure it.
When you copy the page, you need to measure the copy to ensure it is the correct size. If it isn’t, adjust the percentage setting up or down to get the correct size. I generally nudge the setting 1% at a time. If you use the same copier each time, make a note of the percentage change as it should be used consistently for that pattern. Even if you have multiple patterns from the same designer, always check the registration marks when copying.
When you print the page from an electronic file, you have other options, which may help. Some printers have a scaling selection. The options are usually FIT or FILL. Fit means the printer will shrink the document to fit within the margins. FILL means the printer will not shrink to fit within the margins. Generally, you will want to FILL the page, but understand you may lose anything in the margins.
Printers also may have an option to pick a percentage of scaling when you print. You will need to experiment to know how these settings will help you. FIT will shrink the document to fit inside the margins. ACTUAL size should not shrink the document, but sometimes it still does. CUSTOM size is generally the safest selection, which you can nudge until the size is correct.
This may seem like a time-consuming exercise, but it is worth it! If you printer/copier FITS the document, your pattern may be up to 1/2-inch off! Say your quilt consists of a five-by-five layout of 6-inch blocks. If you lose 1/4-inch on each block, your quilt will be 1 1/4-inch smaller than anticipated. Then, you try to add a solid border piece, which is definitely too big. How much do you trim to get to the right size? Too little, you will have a ruffle. Too much, you won’t have a square quilt.
Given the consequences, I think it is worth the time to make these measurements and adjustments!
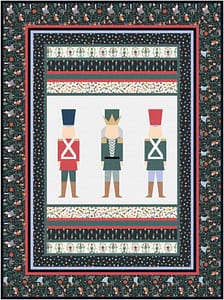
There is a second import line on some patterns, the registration line (blue arrow points to it), if you have foundations or templates that are larger than the paper size, like in Gingerbread Soldiers. These registration lines help you tape the pages together to get the correctly sized foundation or pattern. The objective is to overlap these registration lines and tape the pages so the lines match up. I typically trim one of the two pages to the edge of the line so they are easier to tape together without the use of a window or light box.
Hopefully, your designer will provide the registration square and lines, as well as measurement for the size of sections or units of the quilt as you complete them. These give you good measuring points as you sew to ensure you stay on track.
If you have any tips to help with copying and printing, please comment on this post!
Happy Quilting!
Laureen


