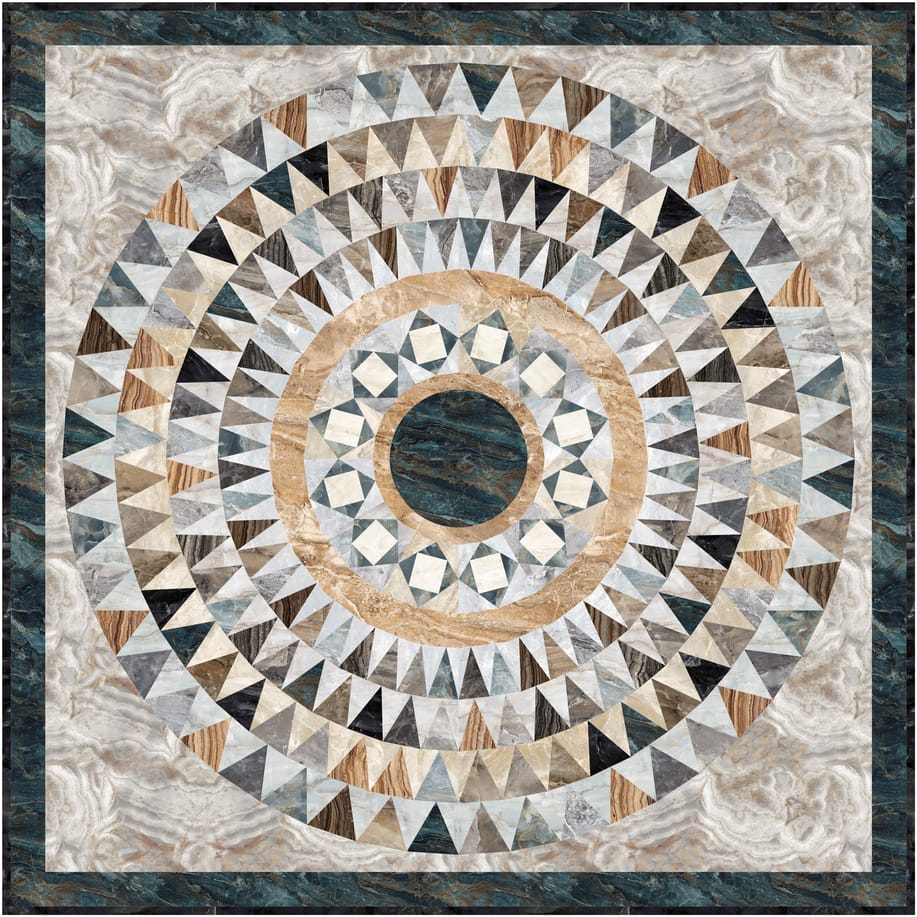
During the last two weeks, I worked on San Marco and posted pictures in Instagram and Facebook with some helpful hints. Not everyone likes social media, so I decided to add a little of it here.
San Marco is a foundation pieced throw, which finished at 53″ Square. There aren’t any curves, despite the illusion. There are gentle y-seams though.
Here are a few pointers to start.
- The Stonehenge Surfaces collection has SKU # printed on the selvedge, which makes finding the right fabric a little easier. However, some SKUs are duplicated as the printed SKU designates the pattern, not the color. So you may still have some guess work. My recommendation is to click on the link for the collection and compare the thumbnails to the fabric for your best matches.
- Print/copy the foundations from the same printer/copier. This ensures all of the foundations are the same size.
- Check the registration mark when you print to ensure pieces are the right size. Adjust printer/copier settings as needed. Since the medallion is all foundation pieced and then appliqued
- Use thin copy paper. I use 20 lb recycled paper.
- Starch the fabrics before cutting. This minimizes warping and makes pressing for foundation piecing easier.
- The Creative Grids Stripology Ruler made quick work of the small pieces.
- Place the same sized pieces in a bag to minimize mix ups. The only pieces where the colors really matter are for section C. The others are scrappy!
- Smaller stitch length 1.5 or 2.o prevents stitches from pulling out when you remove papers.

Center
With those pointers, you are probably ready to get started. The center circle can be made in a variety of ways. It can be appliqued to the top or you can make an inset circle. I am not good at inset circles, so I chose the applique method. To make the circle, I cut two, sewed them right sides together and then turned and pressed them.

Section B
The next step was to make Section B. I used freezer paper templates to cut these pieces out. Freezer paper is great for this application as it ensure the template doesn’t move. I folded cut strips in half and placed two of them on top of each other. To the top layer, I fused the template. This enabled me to cut four at a time. Cutting more than four at once can lead to errors. If you try this, make sure your rotary cutter blade is VERY sharp. Sharp blades will cut instead of fold the fabric. One customer asked why I did not make this one piece. The main reasons was to ensure angle in the middle. That midpoint is important for matching to add Section C. Also, if you want a scrappier look, you can use two different fabrics here.
Section C is where the fun foundation piecing begins. The pieces were cut to make them easy to fit. This also means that there is a bit of excess. I plan to use the scraps from this to make another scrappy quilt block. I will let you know how it goes. Section C, like any foundation, can be finger pressed or you can use an iron. I have found that an iron minimizes the poof factor. Here is a link to the Facebook live video recorded when making Section C.
Section D is made like Section B, with freezer paper templates.

Small Wedges = Sections B, C & D sewn together
Once Section B, Section C, and Section D were complete, I couldn’t resist putting them together!

Assembled Sections
Sections E through H are simple foundation piecing, which may remind you of New York Beauties or Sawtooth borders. Each of these sections has a common light color. The darker colors are scrappy. To ensure a scrappier look, I took the dark pieces and laid them out on the table like I was playing Concentration or Solitaire. Then, I stacked the pieces back together. This randomized them a bit. I tried hard not to have two of the same color next to each other. The end result was a pile of foundations, ready for making the large wedges.
Sections E through H are sewn together in pairs. Those pairs are sewn to the Small Wedges to make Large Wedges. I laid out each large wedge before sewing so I could pick colors for the wedge. I didn’t want to many of one color or fabric in the wedge. There are subtle y-seams as you sew these together. When sewing these y-seams, sew to the pivot point. Leave your needle down and lift the presser foot up. Realign the edges and resume sewing. Once you get the hang of it, the wedges go together quickly.

Large Wedge
When assembling wedges, there are a few good tips.
- Remove paper from the seam allowances. That will help pieces lie flat. I use the Foundation Piecing Water Pen to help remove them
- Neat seams. This means you. Red to ensure they are facing opposite directions when you start.
- Start from the middle. Yep, just like adding a sleeve. You start by matching and nesting seams in the middle. Align edges. Sew to point. The point is subtle, but there. Realign and sew again. Don’t be afraid to tug a little to ensure ensues meet.
- Make sure your needle is down when adjusting!
- Trim when all sections are assembled.

Quarter
Press wedges and trim edges. Then, sew them together in quarters. This way you can check against a large mat to see if they form a 90-degree angle. Keep the paper o the back, but remove it from the seam allowances. This will keep it from warping, but allow it to lay flatter. When I remove the paper, especially from the seam allowances, I use a water pen to moisten the papers at the seam. This helps them pull away easier.
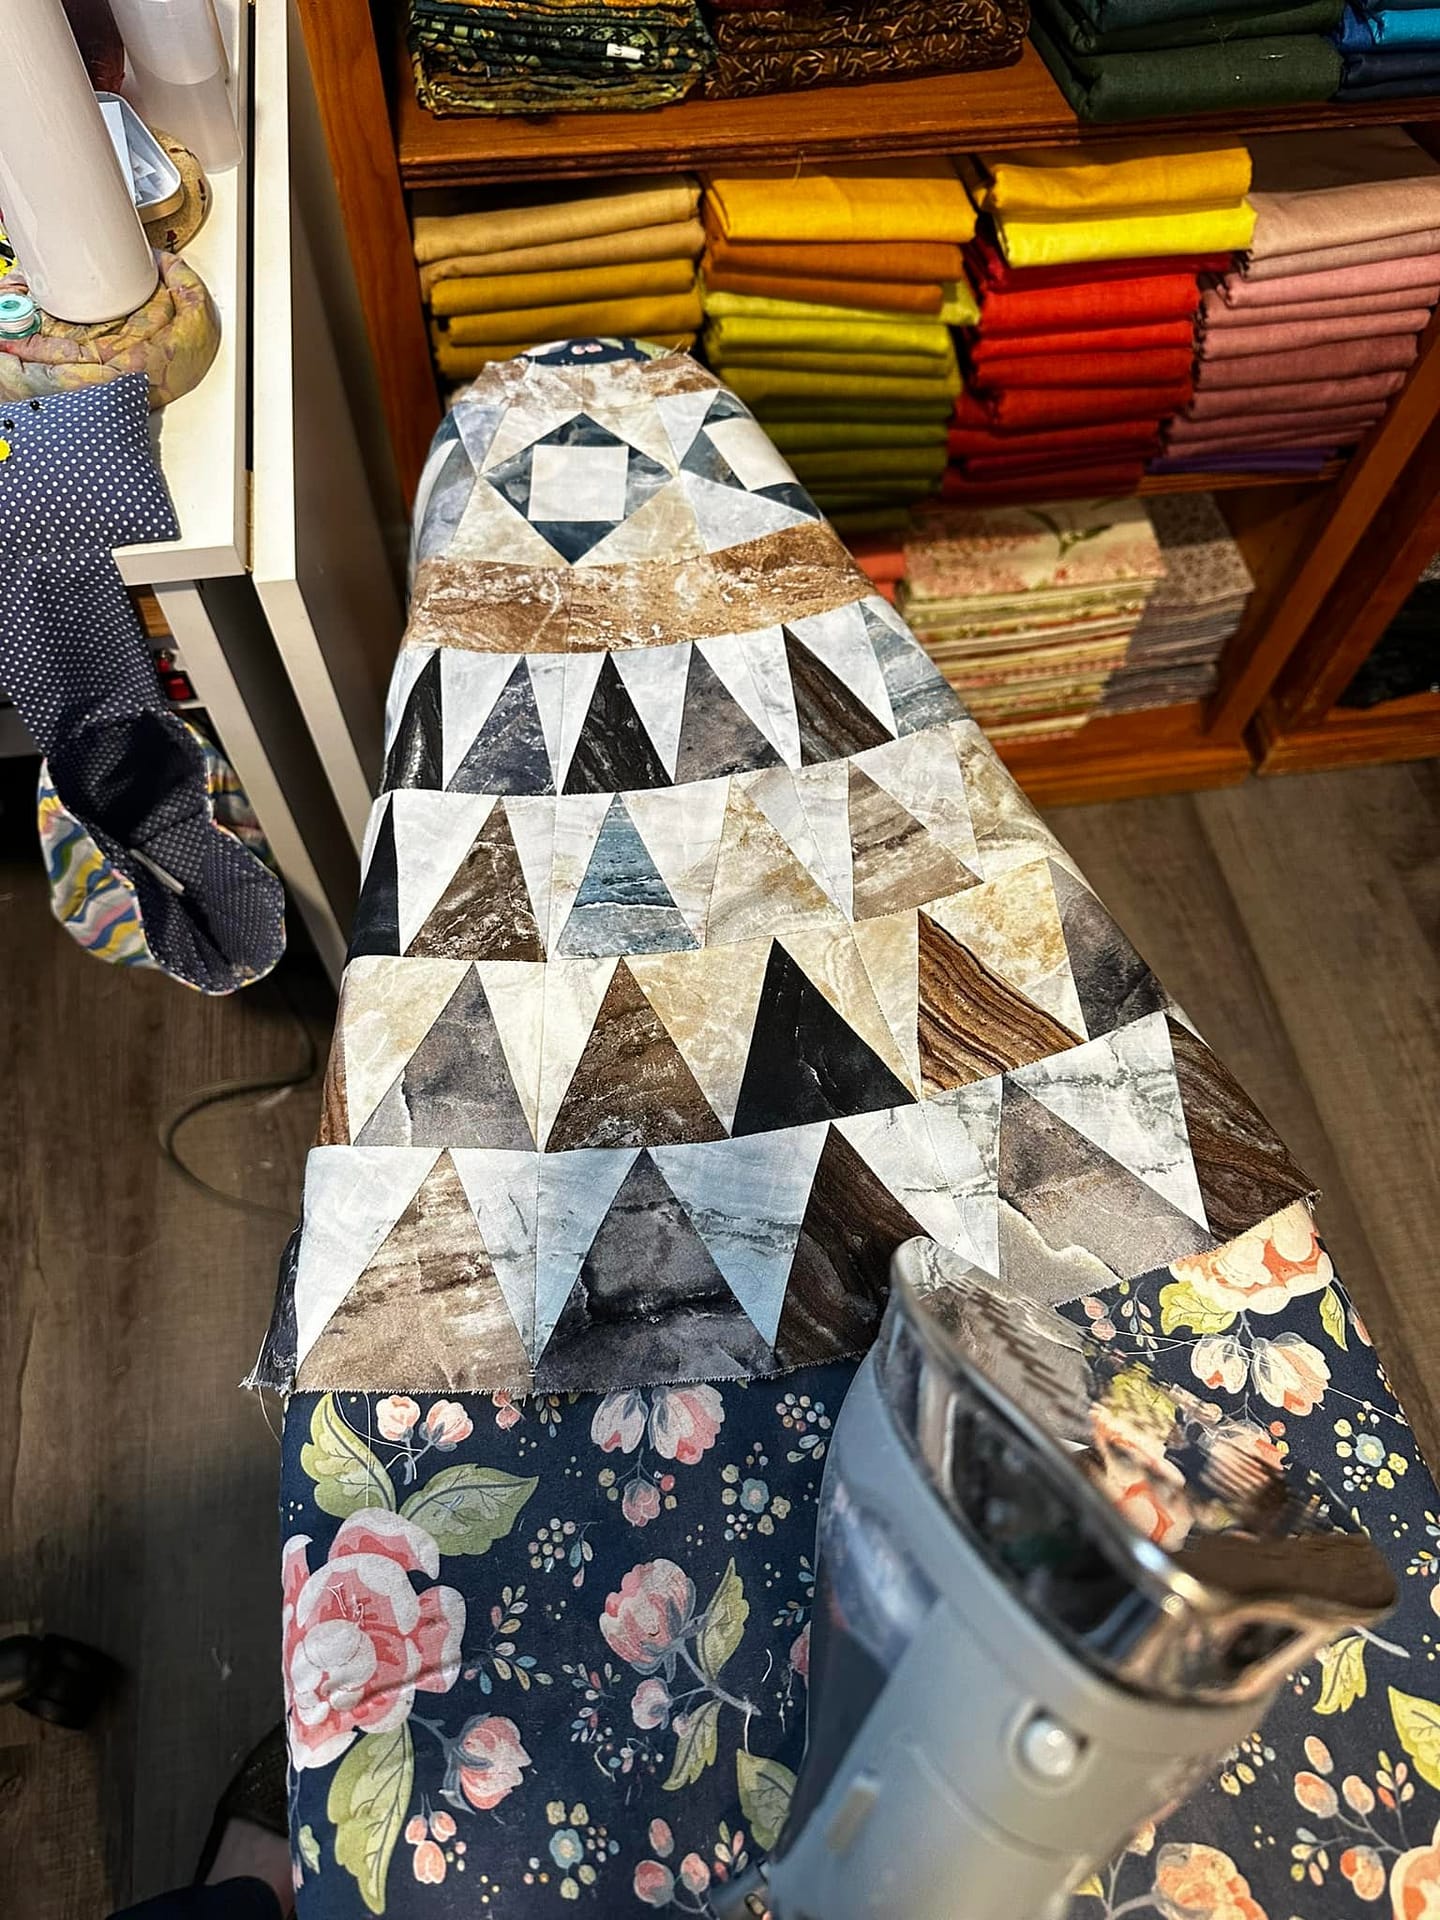
Pressing Seam Allowance
Sew the quarters together to make a wheel. Then, press the seam allowance for the outer edge. I have found that my traditional ironing board works well for this. I can put the opening of the wheel around the end of the board.
At this point, you can add the wheel to the background. There are two options here. You can do this in one step or two. The two-step method is to fuse, pin or baste the wheel to the background to finish the quilt in a traditional manner. Then, you can quilt the top as desired. I chose the second option, which is to assemble it all in one step – Quilt As You Go! For this method, I used my walking foot.
I layered the backing, batting (wool to give more dimension), background fabric, and wheel. They were pinned together. I started in the center to fix the inner edge of the wheel. Then, I worked in rings, one section at a time, to highlight and echo seams. By working in rings, it kept the back flatter. If I had working spokes (edge to edge), there was a chance of developing a ripple or wrinkle. I made sure have a seam close to the edge of the wheel to secure it.
Quilt as You Go
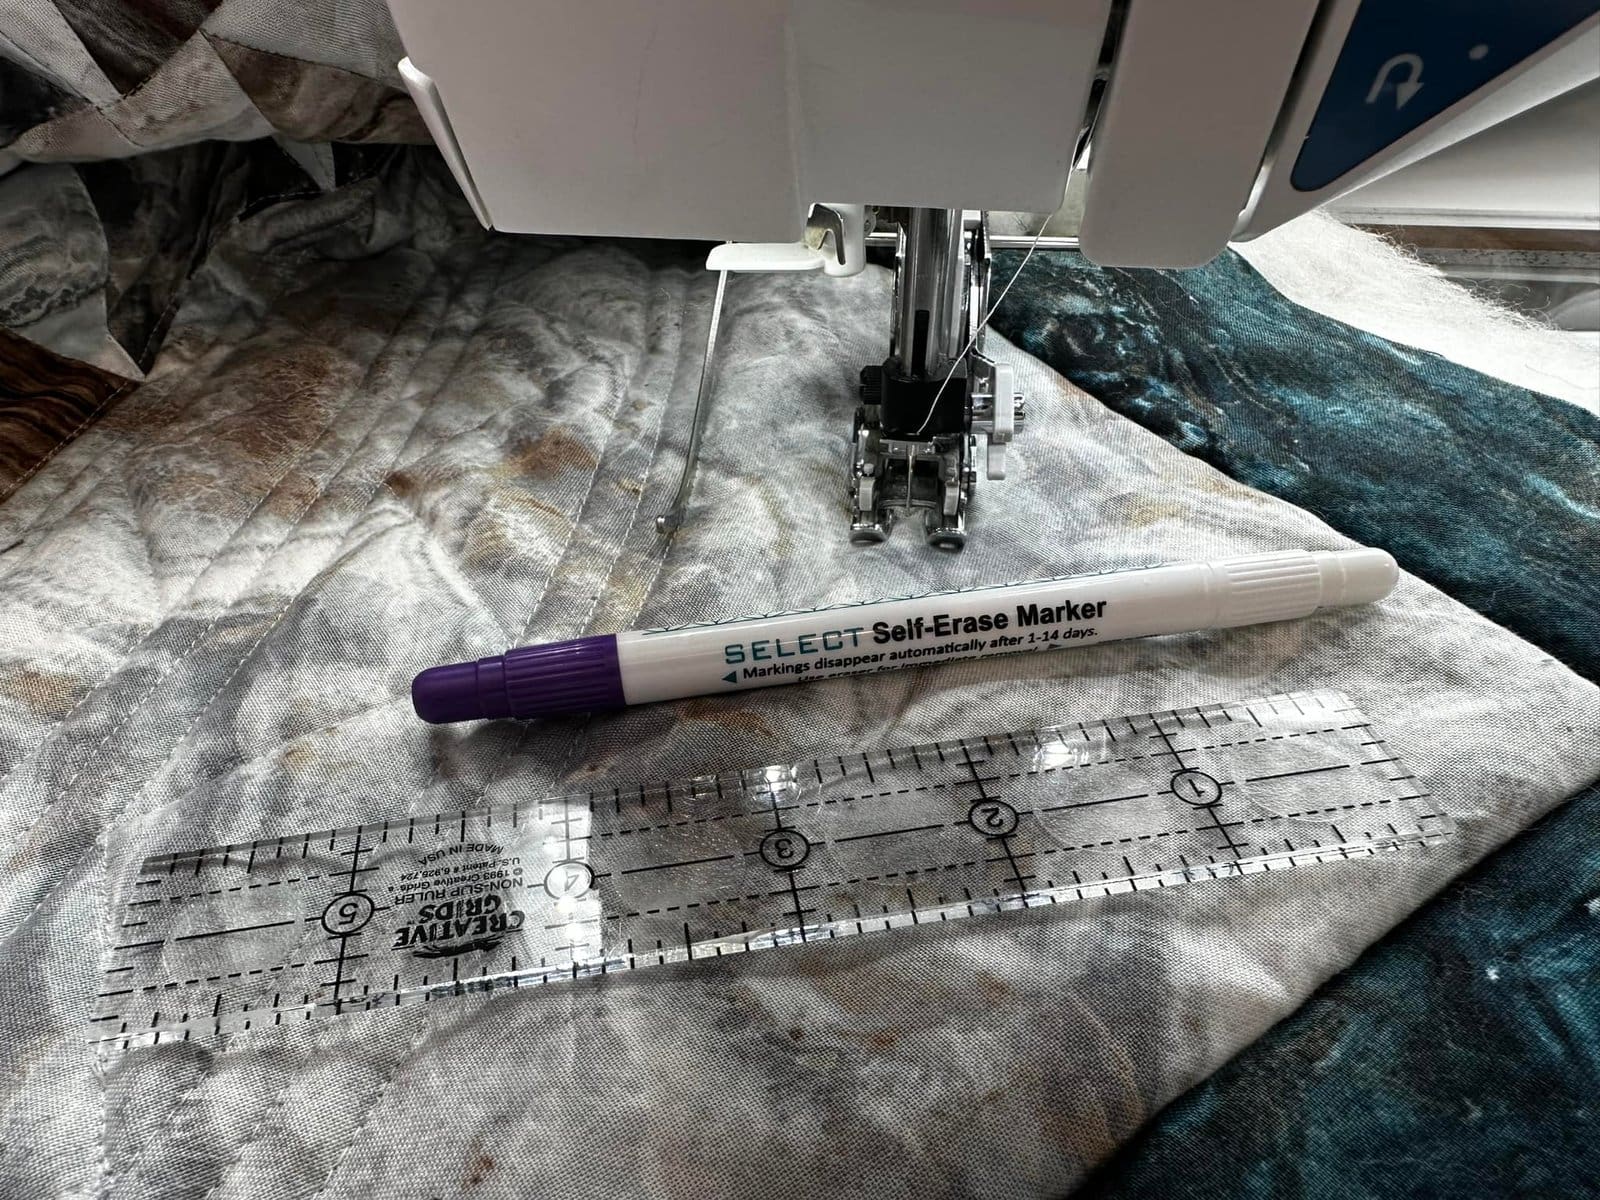
Once the wheel was secured, I added the border strips. Those were quilted on the edge with a straight seam and then one quilt line down the middle of the strip. After quilting the border, I added quilting to the background negative space. I worked from the edge of the wheel to the border with a mock zigzag – similar to the wheel. For this, I have a few favorite tools: Walking foot with extension arm, small ruler and Select Self-erase marker. The extension arm helps me to keep sart distances from seams, quilt lines or fabric highlights. The marker works really well, just don’t mark too much in advance as it can disappear quickly! I use the marker to make dots. This guides my quilting – like dot to dot.
Finally, I added the center. I used a blanket stitch and matching thread to secure it to the quilt top. Then, I quilted a star design into the center. It was created with four triangles. Each triangle connected point on the edges of the wheel. I am pretty pleased with the quilt.
Happy Quilting!
Laureen

San Marco Finished

Hello, I am just reading over the instructions for the San Marco pattern. I would like clarification of the term “FTSP”. I think it is just foundation paper piecing but wanted to make sure.
This looks like it’s going to be fun and a bit challenging (those “Y” seams are a little scary) but am excited to get started.
Thank you for your time.
You are right! It is just Foundation piecing – fold the foundation, trim the fabric, sew the pieces together, then press open.
If you have any more question, just let me know!