Quilt as you go is a quick and easy quilting technique for newbies and veterans. I discovered this technique about 15 years ago while my mom and I were on a Shop Hop. A cute spice scented shop in Western New York had several adorable table runners on display with quilt as you go kits staged nearby. I had heard about the technique from the Genesee Valley Quilt Club, so I bought a kit and decided to give it a try.
Quilt as you go combines piecing and quilting in one easy step – by breaking the rule of starting with the top.
Step 1 – Open Faced Sandwich
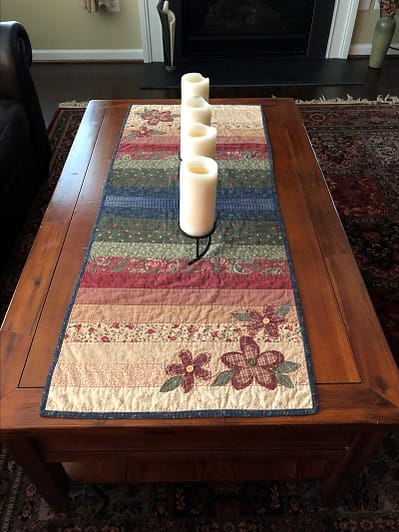
Place your backing on your worktable right side down. Lay the batting on top of the backing. They should be about 4 inches larger in both length and width than the desired finished size of the project. This finished project was 18 inches wide and 50 inches long. Therefore, the backing and batting were 22 inches wide and 54 inches long.

Step 2 – Add the Topping
The best toppings for this type of quilt are strips. The strips can come from your fabric stash or a jelly roll you just couldn’t live without. Pin the first strip to the middle right side up. Place the second strip right side down on the first strip. Sew a 1/4 inch seam through both strips, the batting and the backing. Press the seam open. Continue to sew the strips one on top of the other until the entire top is covered.
Step 3 – Trim to Size
Once you have all of the strips attached and pressed open, baste the top 1/8 inch from edges of the desired top dimensions. I recommend a contrasting thread so it is easily seen. Then, use a rotary cutter and straight edge to trim the top to the desired size. The basting should still be visible and attached.
Step 4 – Bind the Quilt

To finish the quilt, you need to add a binding. I have a cheater method for binding for those who are new to quilting. If you are more confident, you can add a traditional binding to the quilt.
Step 5 – Embellish
You can embellish the quilt as you see fit. This quilt pattern included applique flowers with buttons for the flower centers. You can do almost anything your creative heart desires to embellish the quilt. Some ideas as applique (fusible, raw edge or needle turn), embroidery, and/or beading.
Step 6 – Pat Yourself on the Back
You have hopefully finished this project over a weekend.
Please share your pictures of any Quilt as You Go projects you have completed!
Happy Quilting
Laureen