Whether you are downloading a pattern to print or buy a paper pattern where you need to make copies for your personal use, getting the proper size matters.
Yes – most designers add the 1-inch registration mark, but sometimes it is hard to tell if you have it right or not. Is there another way?
Yes – there is. Hopefully, your designer will have provided some indication on how big the blocks are supposed to be.
If you are simply dealing with foundation piecing, the printing should scale equally. Meaning, if your foundation is off on one side by 2%, it will be off by 2% on all sides. So, the entire block will be 2% smaller. That is not a disaster.
However, if you are matching this up with traditionally pieced blocks, this will be an issue. They will be different sizes. This is a big deal.
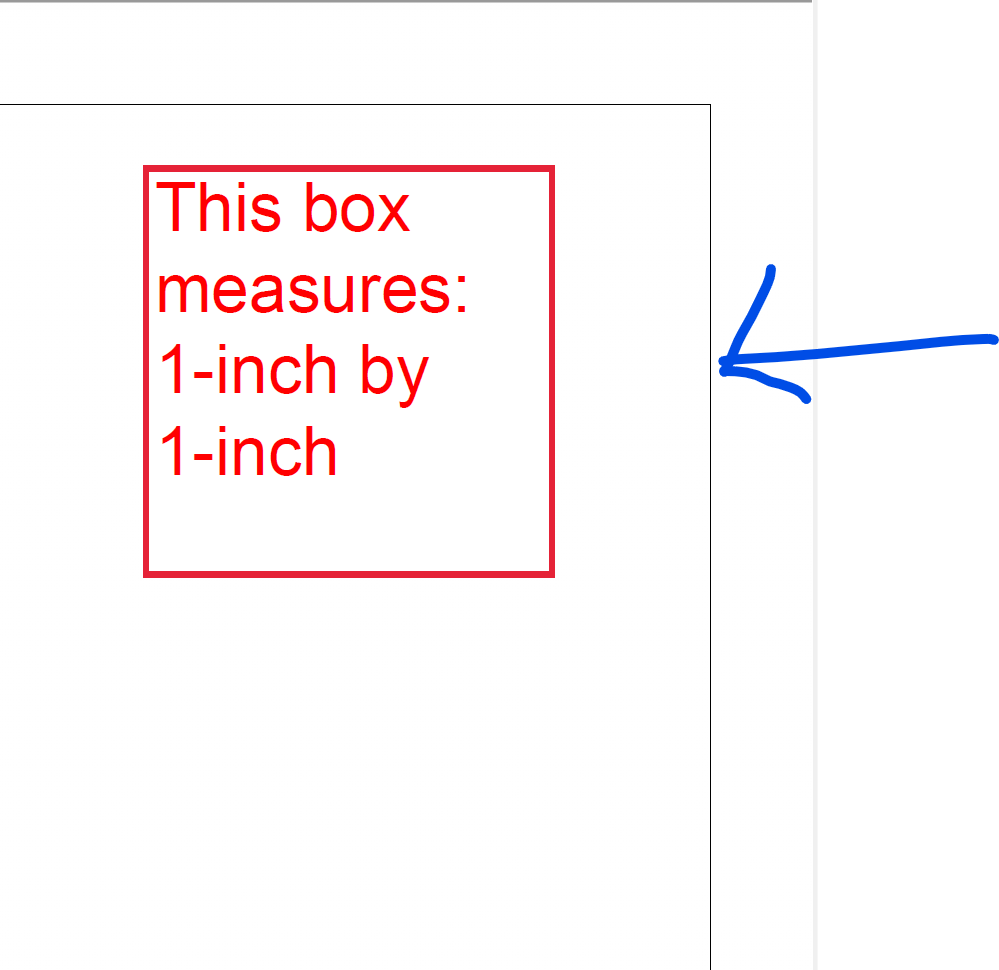
The first step is to measure the 1-inch square on the pattern. If it looks like it is 1-inch – great. Take the additional step of measuring the entire piece. Does it match the measurements in the pattern?
If you answered yes – that is great!!
If you answered no – we have a little work to do.
The printer/copier usually defaults to provide 1/4″ margin on each side of the page. Therefore, the image is shrunk to FIT the printing space. This means that the image is actually printing to 8″ x 10 1/2″ instead of 8 1/2″ x 11″ (for US paper sizes). This can vary by printer… so check carefully.
There are a few steps to take to get the right size. Print one page for a test, so that you don’t waste paper.
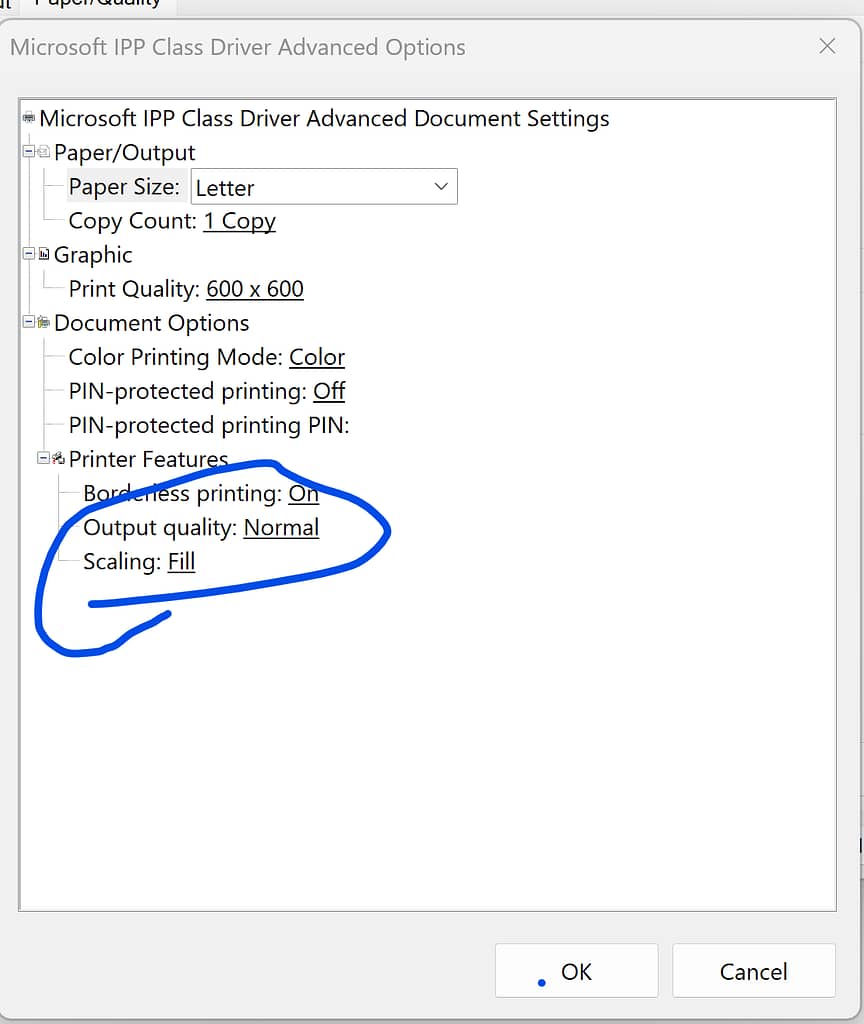
- Check your printer/copier settings. There should be an option for “FIT” to printable area. If this is checked, it is shrinking the image. You do not want this! You will want to select an option that is either “FILL” or “NONE”, to remove this scaling. Try printing after making this change.
- If that didn’t work, you may be able to check a box in your printer/copier settings for 100% or actual. Try that next. Again, print an example to see if you were successful. Sometimes, you may need to do both of these steps depending upon your printer/copier.
- Don’t panic if that didn’t help either. The next step is to manual set the correct enlargement.
- Measure the size of the block as printed. I will provide an example that the block is printing at 4 1/4″ wide. This is the Actual Size.
- Find what the block is supposed to be. In this example, the pattern says it should be 4 1/2″ wide. This is the Design Size.
- Now, it is time for a little math. Take the Design Size divided by the Actual Size to calculate what percentage you need to change the image. Take this number and multiply it by 100%. For our example, (4.5/4.25)*100% = 105.8%. Most printers won’t use fractions, so round it out. We would increase the size by 106%. This should get you where you need to be!
Where there is a well, there is a way!
Happy Quilting!
