A small project, clear steps, and a fresh look at curved piecing.
I originally revisited the Double Wedding Ring because I needed to test a block for my Viewed Through a Dewdrop pattern. I wanted to be sure the block would behave before committing it to a larger design.
But then… reality set in.
I’m getting a little tired of orphan blocks floating around the studio. So before I even started, I made two decisions, I would:
- Turn this into a small, finishable project, and
- Record the process, because I wanted to make sure you could do it too.
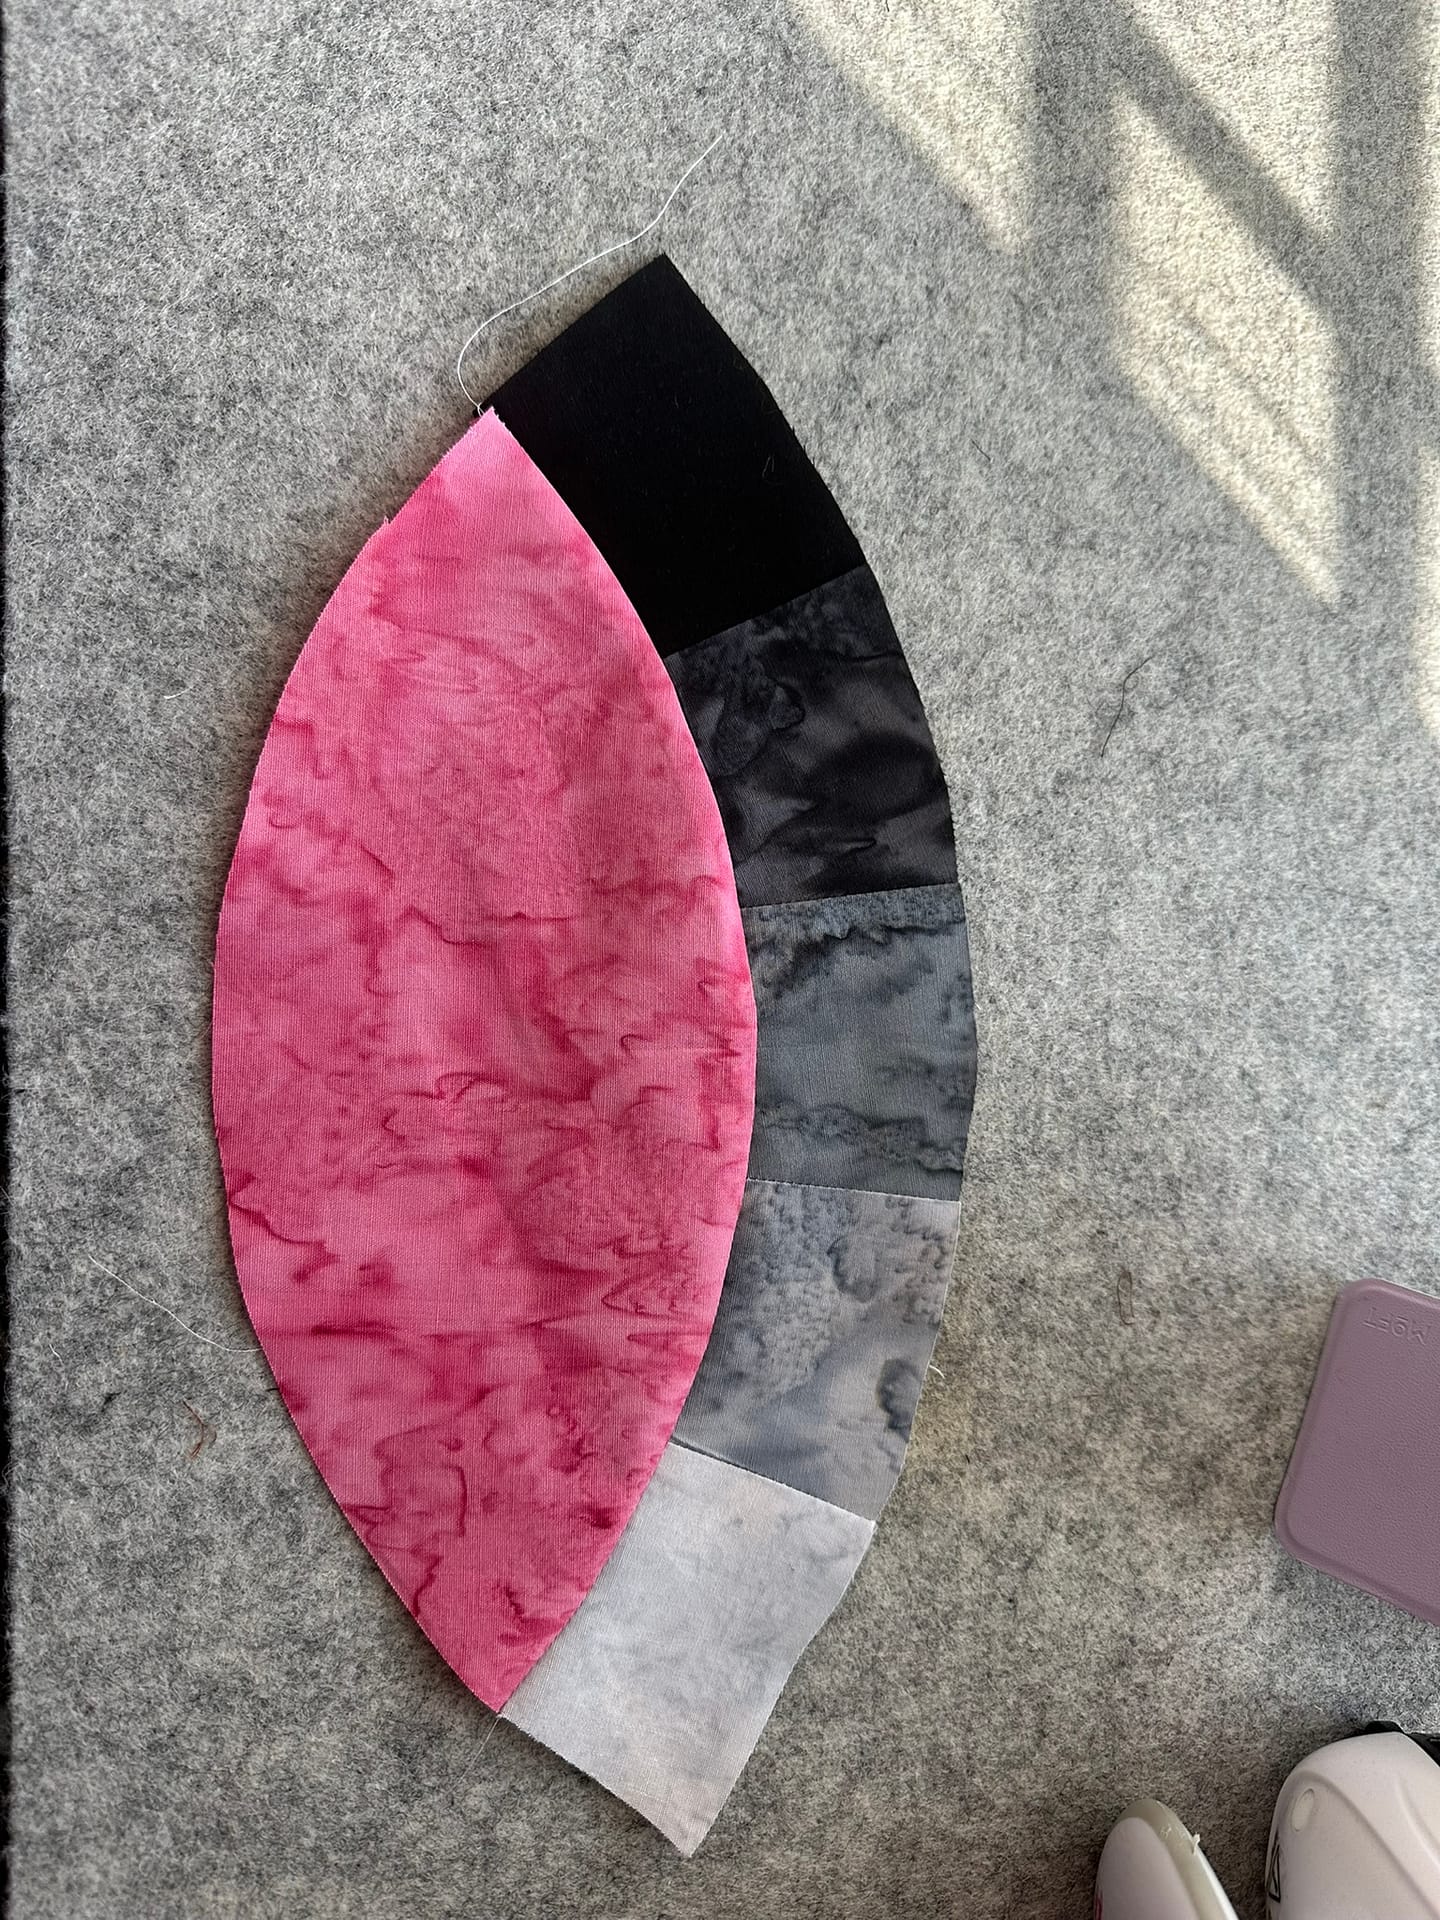
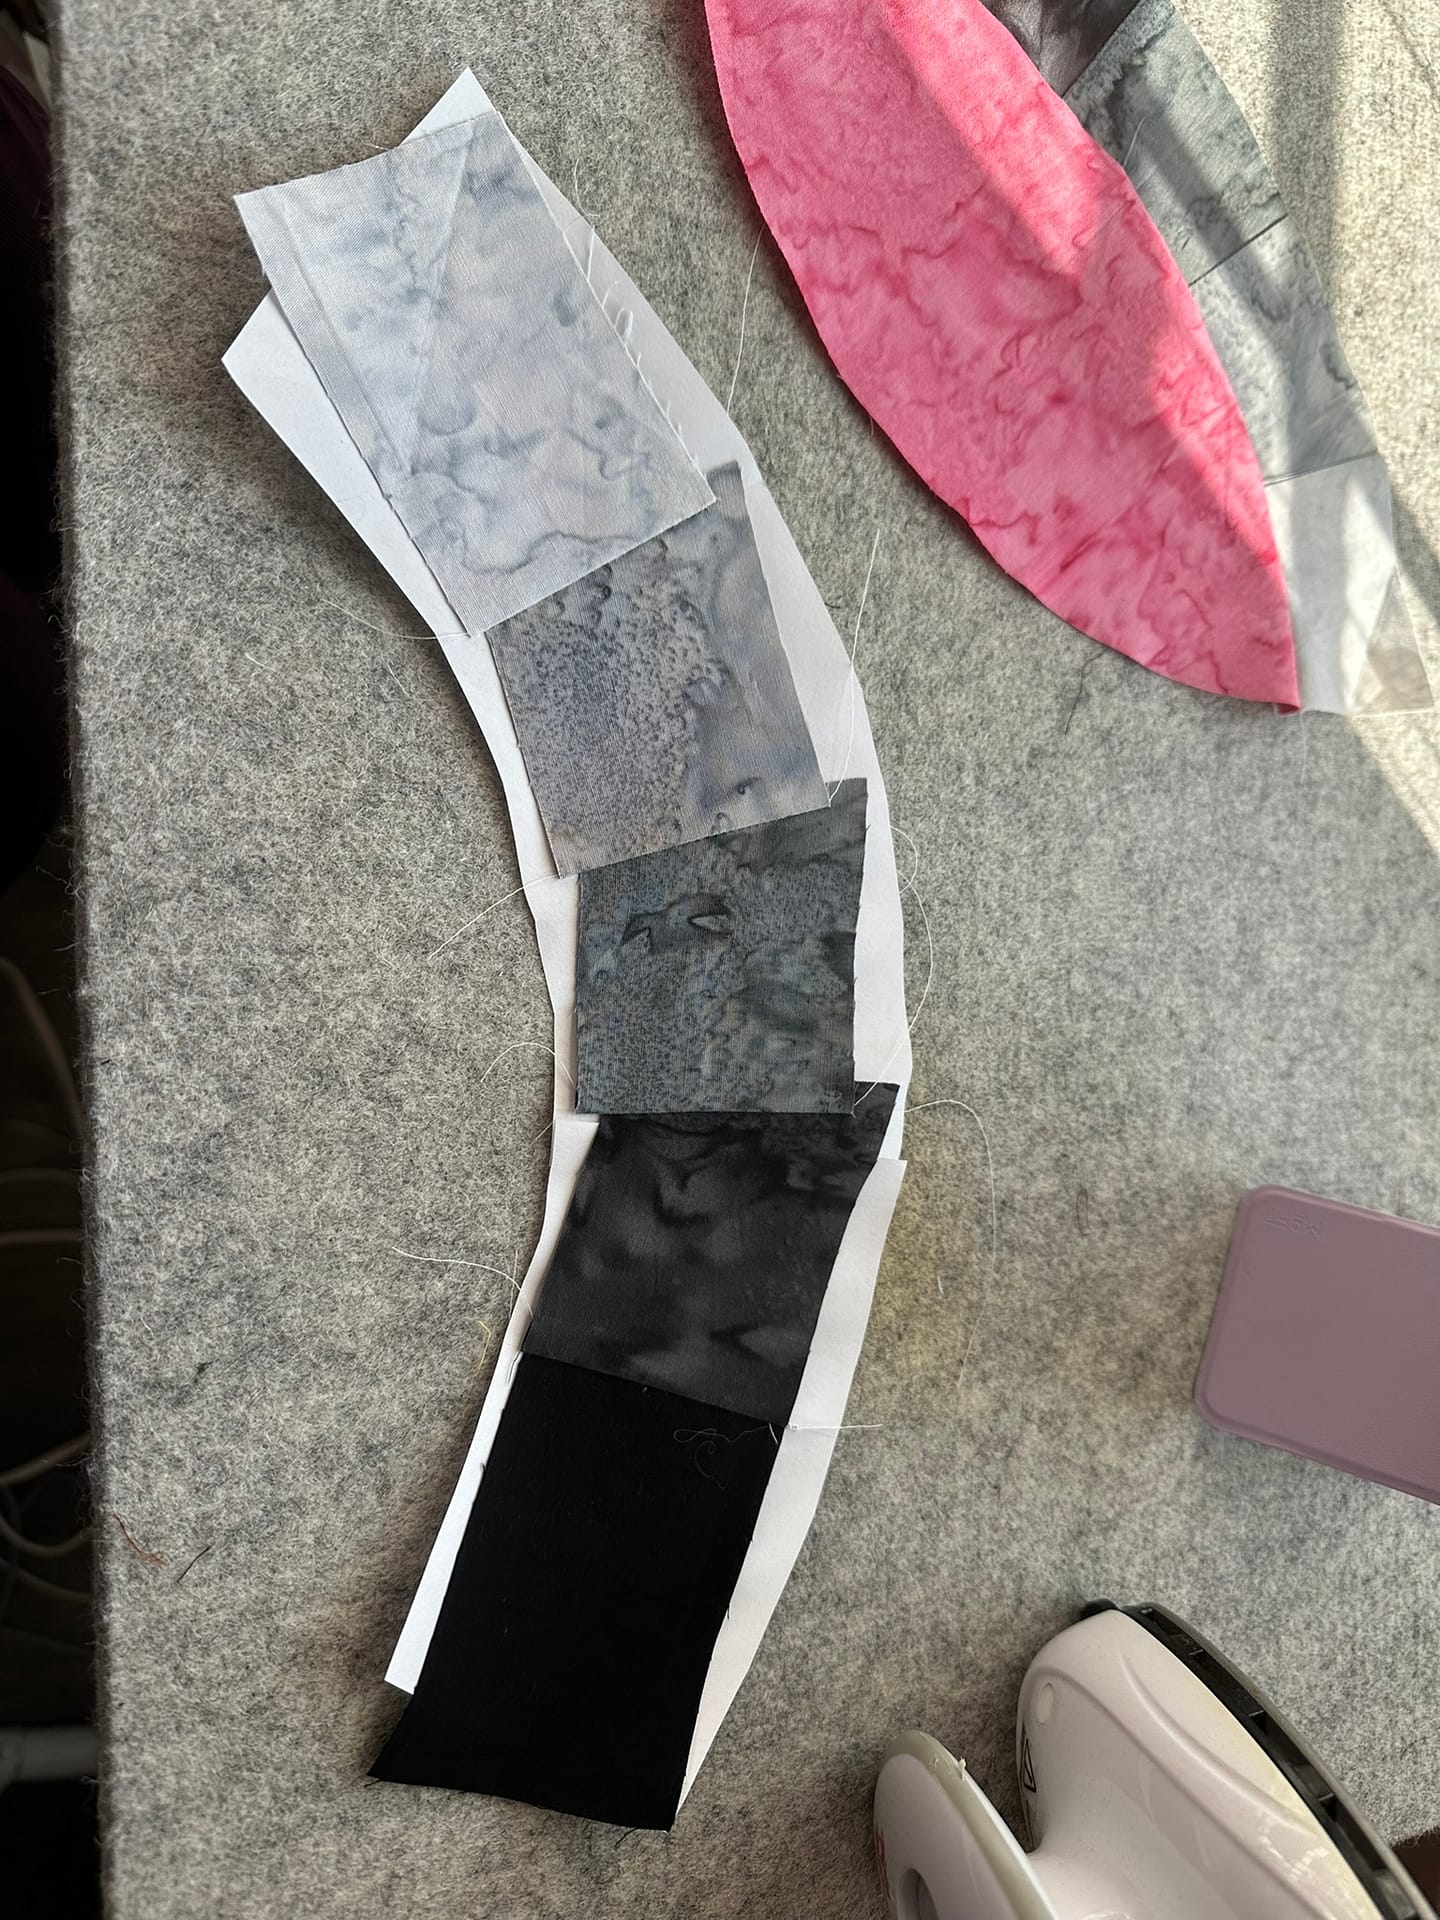
This is actually a fairly simple block, but I know even “simple” can feel confusing — especially if you’re someone who learns by watching rather than reading. And let’s face it… I’m only so good at graphics. 😄 Sometimes video just makes things clearer.
Plus, this felt like the perfect opportunity to play with gradients and see how they interact with the wedding ring segments. Subtle shifts in value and color can change how those curves read, and a small project like this makes it easy to experiment without committing to a full quilt. It’s one of my favorite ways to test ideas — low pressure, lots of insight.
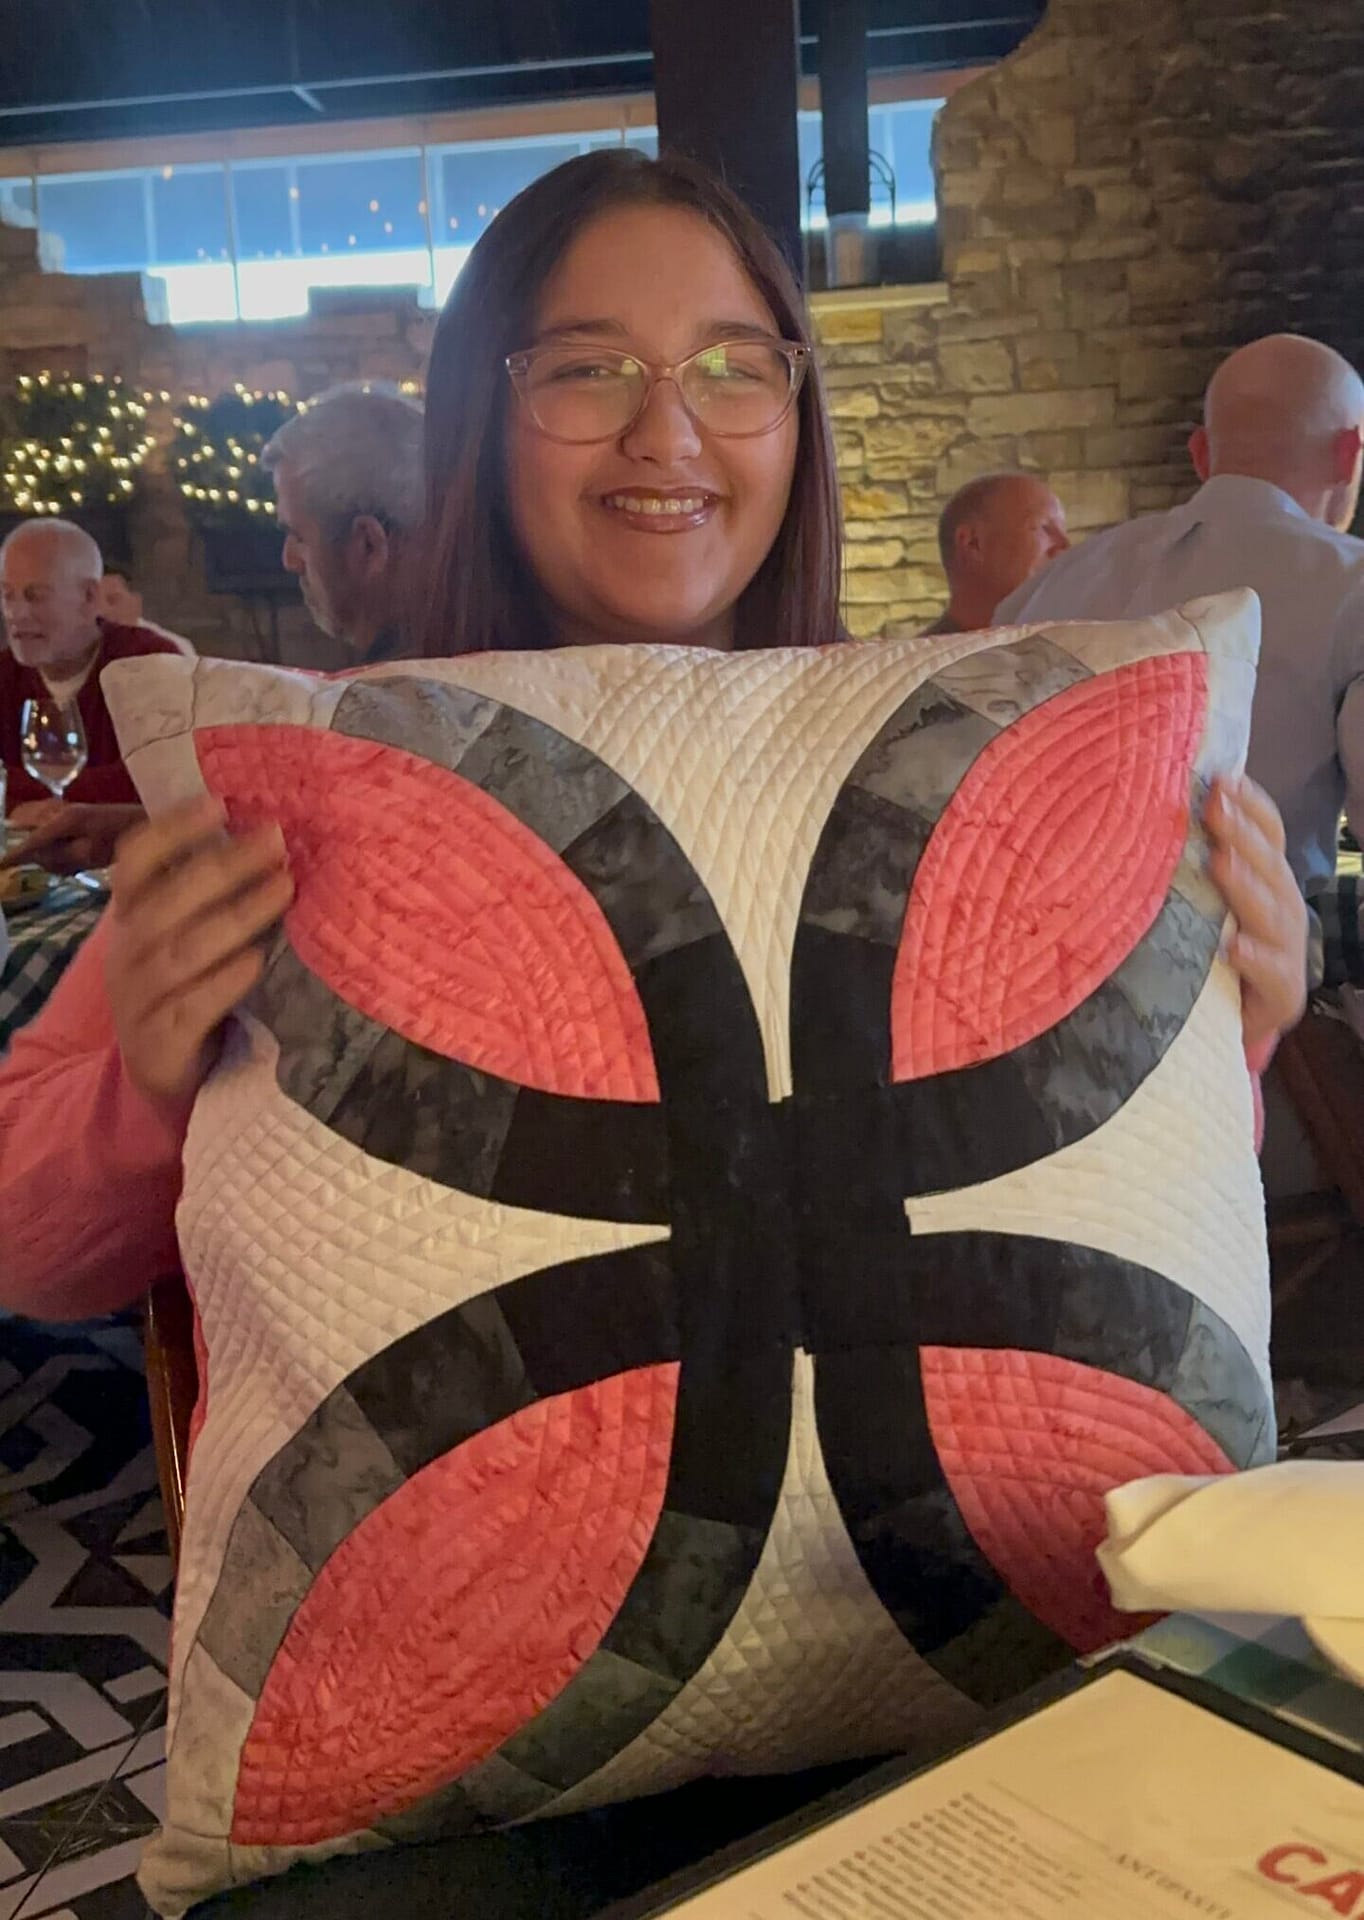
As a bonus, I’ve been promising my granddaughter a pink and black quilt, so this felt like the perfect entrée. Pillows always go well with quilts, so consider this the first installment of what’s coming next.
What You’ll Learn
 There are a lot of little nuggets tucked into this block, so I broke the process into lovely, manageable pieces, each with its own short video. If you like learning one focused step at a time, this format should feel comfortable.
In the video series, you’ll see:
-
Foundation paper pieced arcs
-
Sewing melons and arcs
-
Nesting seams for clean alignment
-
Squaring up curved blocks
Watch the Full Video Series
You can follow the entire process step by step here: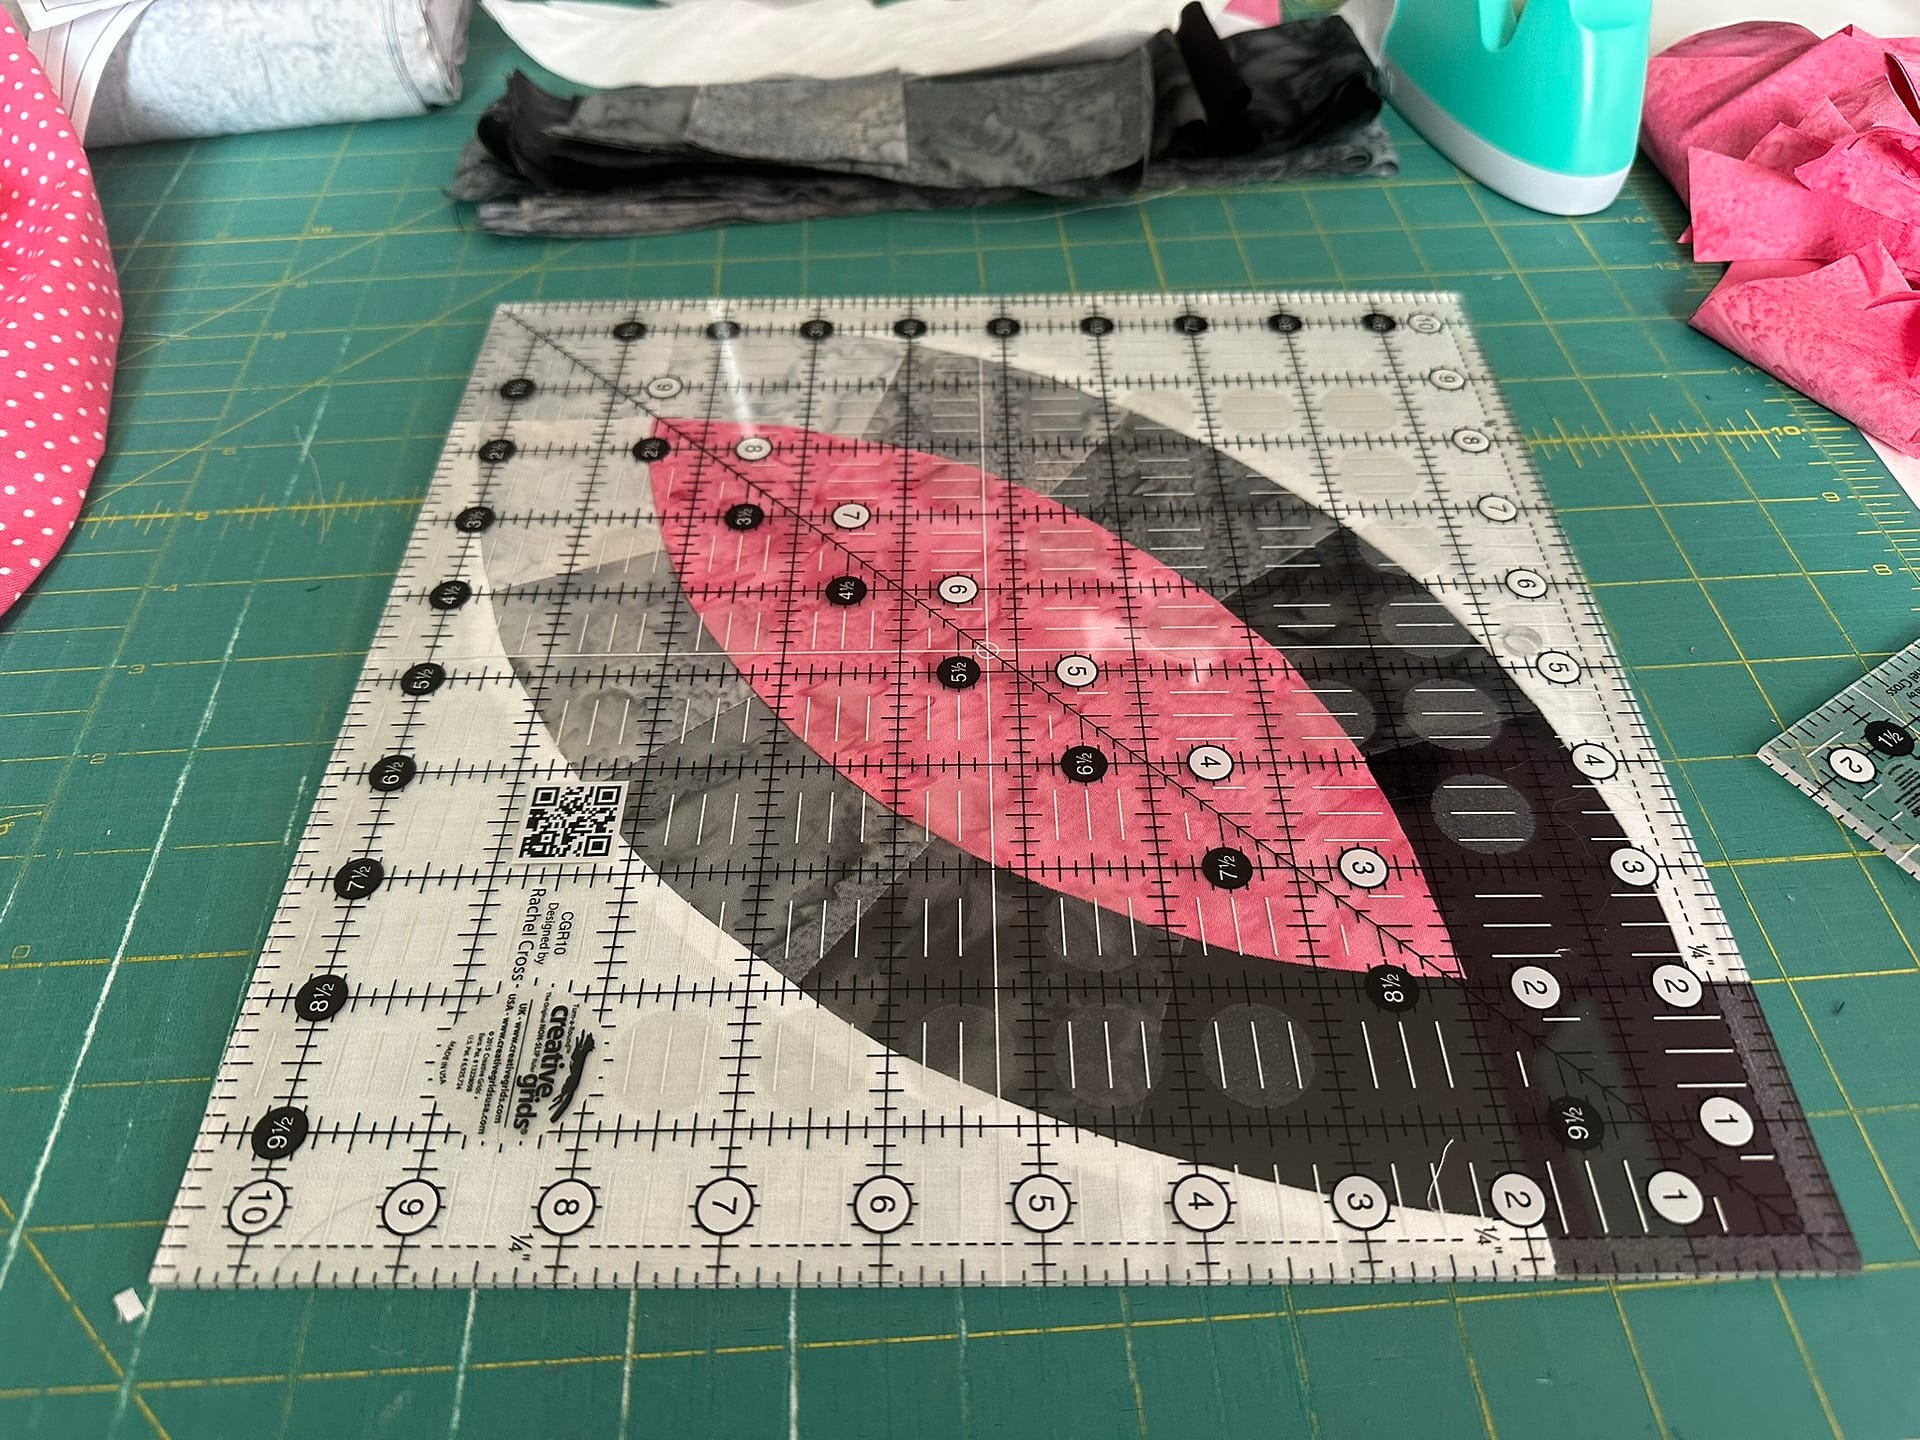
 👉 Double Wedding Ring YouTube Playlist
https://www.youtube.com/playlist?list=PLkqD5_v9zwdR28IfWA4V45Z1pV15XTRUE
Make It Yourself
If you’d like to make this project, the Radiant Raven pattern is available here:
👉 https://tourmalinethymequilts.com/product/radiant-raven/
The pattern includes full written instructions, and there’s also a kit option available if you’d rather skip the fabric prep and get straight to sewing.
How to Quilt It
 Do you struggle with either no idea how to quilt it or so many ideas you get stuck in analysis paralysis? If so, I am right there with you.
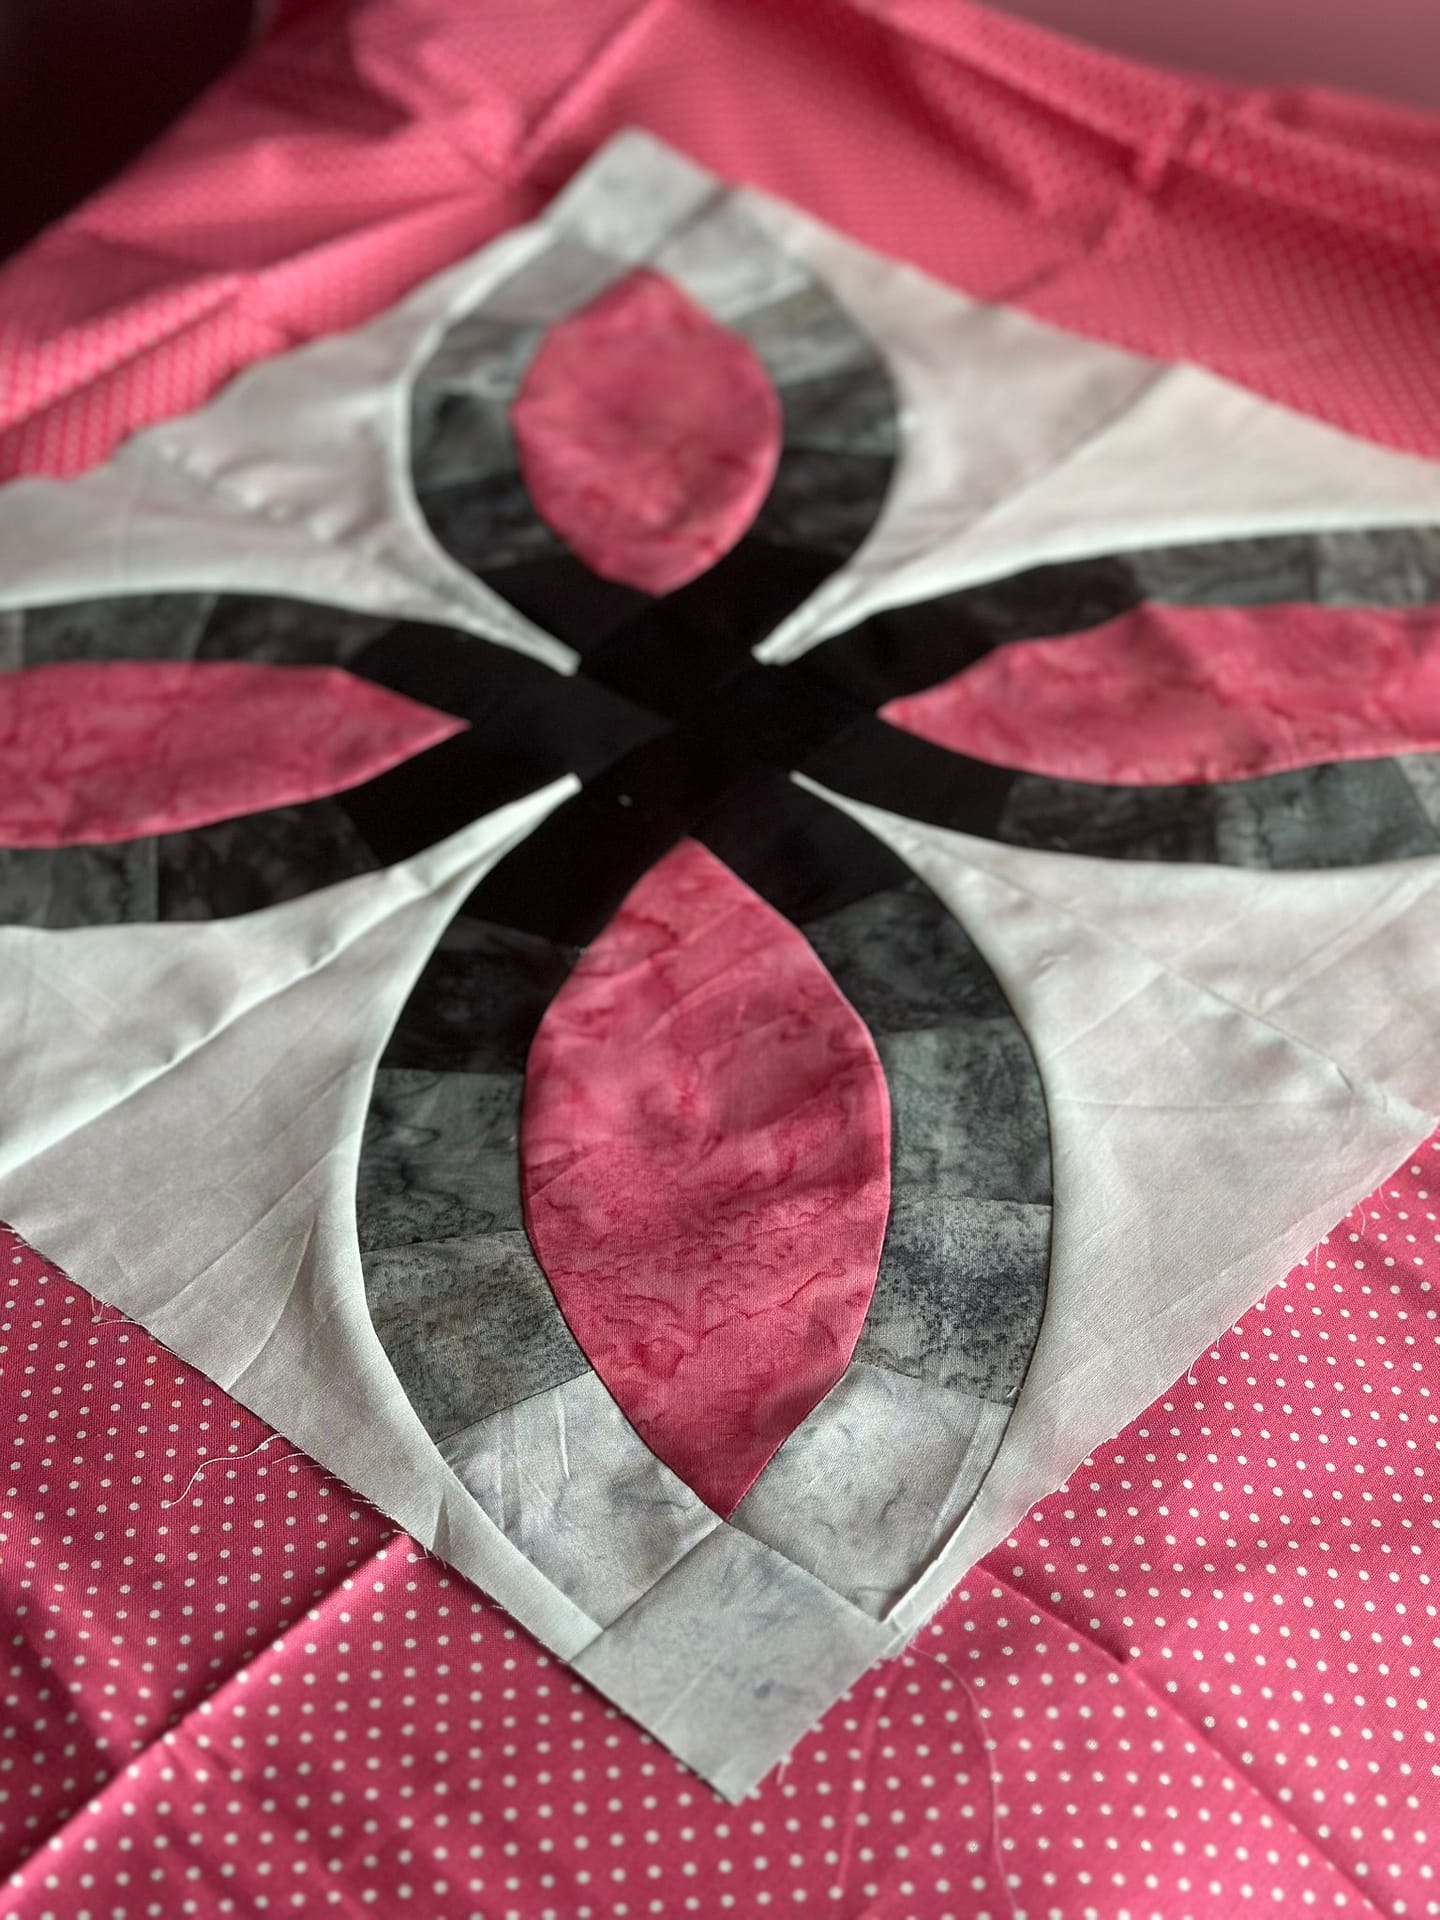
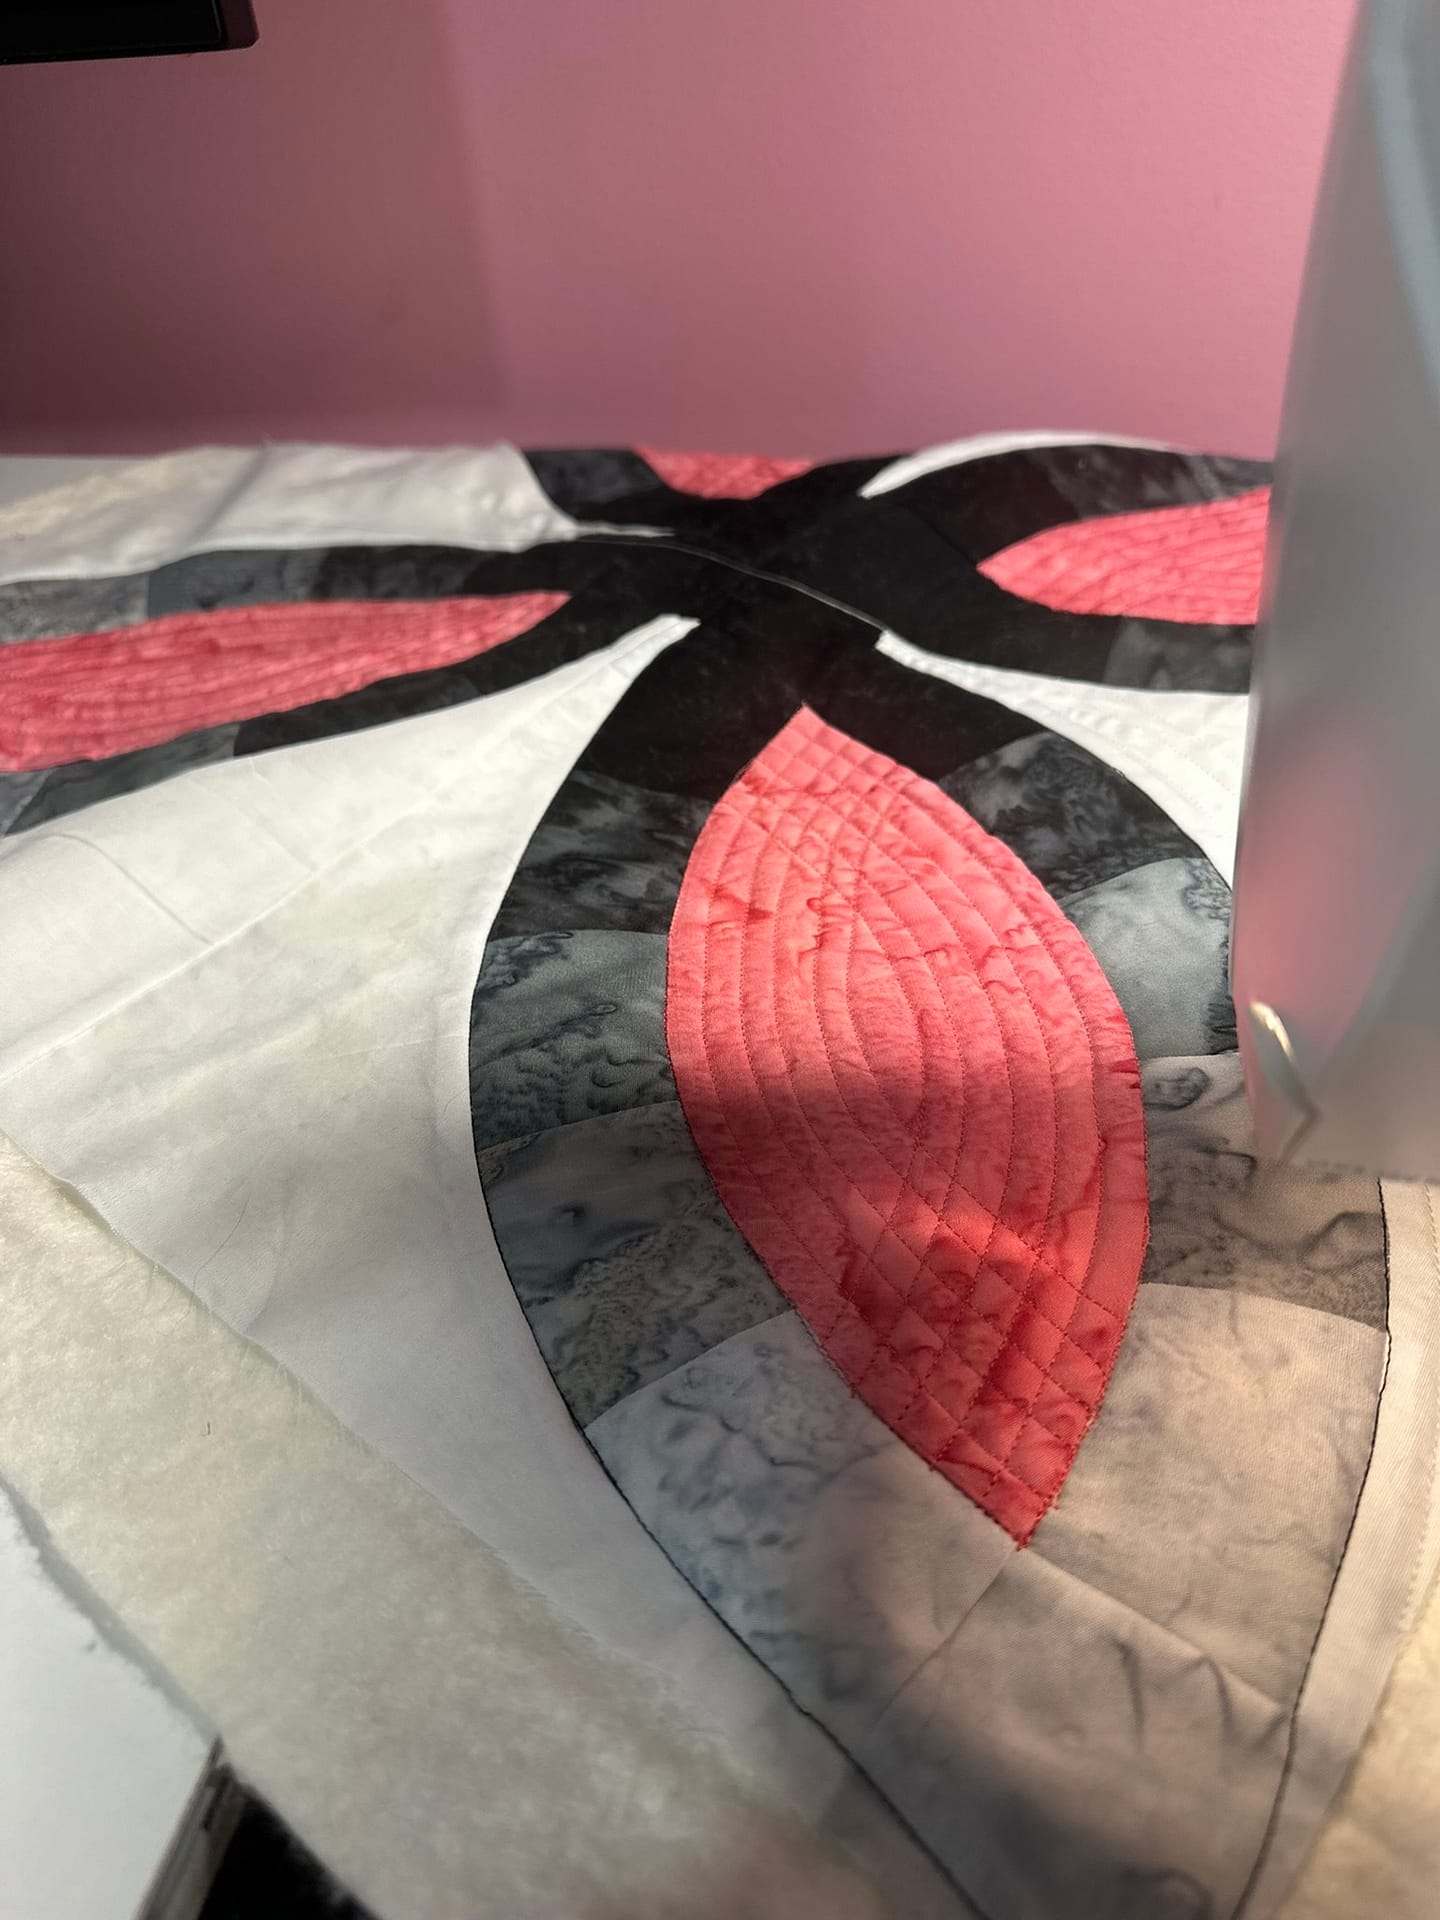
I decided to keep the quilting on this one simple. I did a stitch in the ditch for the pieced sections of the wedding ring. That helped them to stay still so to speak.
Then, I wanted to add a little zing that matched the sassy colors. For this, I used the edge of my presser foot to do a LOT of echoing. First, I tackled the pink. I echoed each curve six times, individually. It was not a bunch of concentric melons, but parallel and overlapping arcs. Each curve ran from seam to seam.
I liked the effect so much that I duplicated it in the white background as well. The arcs overlapped in the center creating almost a second set of quilted petals. I traveled along the seams where I stitched in the ditch or in the excess batting. That really minimized my stops and starts.
Some people have asked if I use a walking foot or a free motion foot. I simply use my standard quilting foot. For some machines, you may need the walking foot to be able to move smoothly through all that fabric. I did not need to with my machine.
I was in a hurry to finally get this project out the door, so I did not have the forethought to film the quilting.
 The Finish
To finish the project, I used a zipper in the bottom. To do that you sew one half of the zipper to the pillow top and one half to the pillow back, right sides together. I did not use a quilted back – just the fun polka dot fabric you see in the picture. Zip the two together, but NOT all the way. If you forget this step, you will not be able to turn the pillow right side out!
Sew around the other three sides like you would for an envelope or placemat. Make sure to stitch OVER the zipper. As long as the zipper is not metal, your needle should be fine. If you are worried, whipstitch it closed.
Turn the pillow casing right side out and stuff with your favorite pillow form.
I did add one special touch – a label INSIDE the pillow. That way it would be remembered and not torn off as an irritant!!
The best part of the whole project? The smile on my granddaughter’s face.
Favorite Notions
Some of my favorite tools for this project were:
-
Creative Grids 10½” ruler
-
Quilter’s Select glue
-
Kay Buckley scissors
Here is the link for Linda’s (http://www.lindas.com/tourmalinethymequilts), if you’d like to take a closer look. It is an affiliate link, which means I do make a small amount from the purchase. And you earn Corey’s Cash on each purchase from them!
Happy Quilting!

