 How often do you think about your ironing board? Honestly, I rarely think about mine, until there is an issue. I have had this particular ironing board for almost 40 years. I take it for granted…. Until something goes wrong.
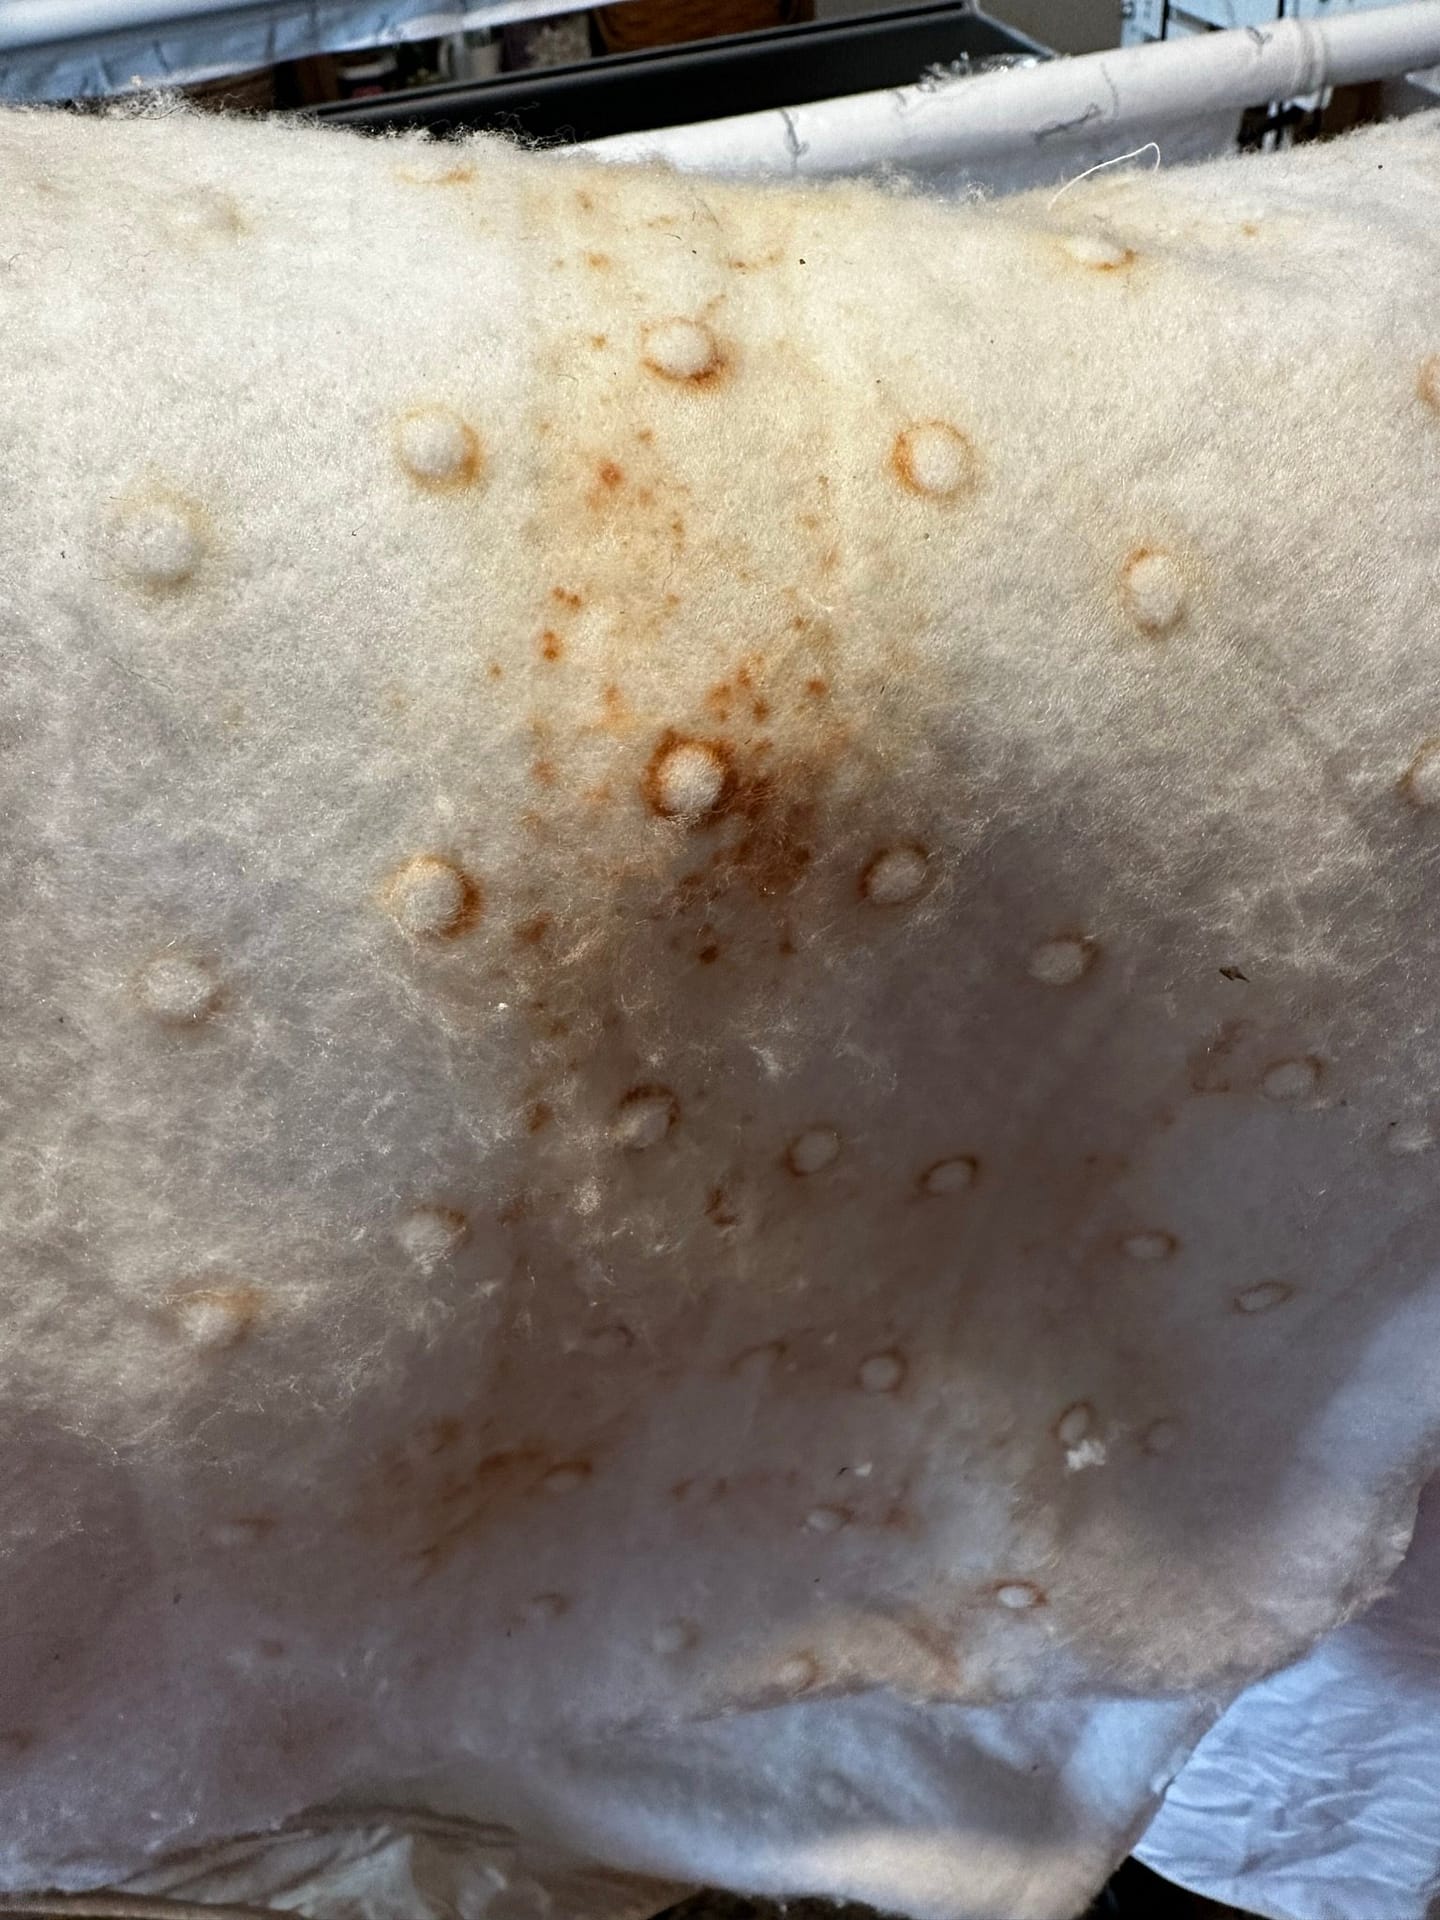
In this case, I noticed something funky seeping into my ironing board cover. I thought it was from all the water, fabric and starch over the past few years…king of a reside from what was on top.
I was wrong. It was blooming from below. It was rust from the metal table of the ironing board. The proof was uncovered when I removed the two (yes two) covers. I had put a new one over the old one not thinking about what lurked underneath.
I could have replaced the ironing board. But that would take a trip to the store and test driving a few. I detest a wiggly ironing board. Plus, I really didn’t want to spend the money. I am hoping upgrade to a rectangular board soon, so would rather wait for the purchase.
 I could have taken it apart and used a little Rustoleum to seal in the rust. Yep, disassembly is necessary unless I want it permanently in the current position. That would have taken a little more time and I am in the midst of a project with a tight deadline.
Therefore, I used a little ingenuity for a quick fix. I needed something to block the rust from getting through to my fabric and remove the build up that was there.
The first step was to wash the two covers and let them air dry. I was afraid they would shrink in the dryer, which would have put me back at my first option of replacement.
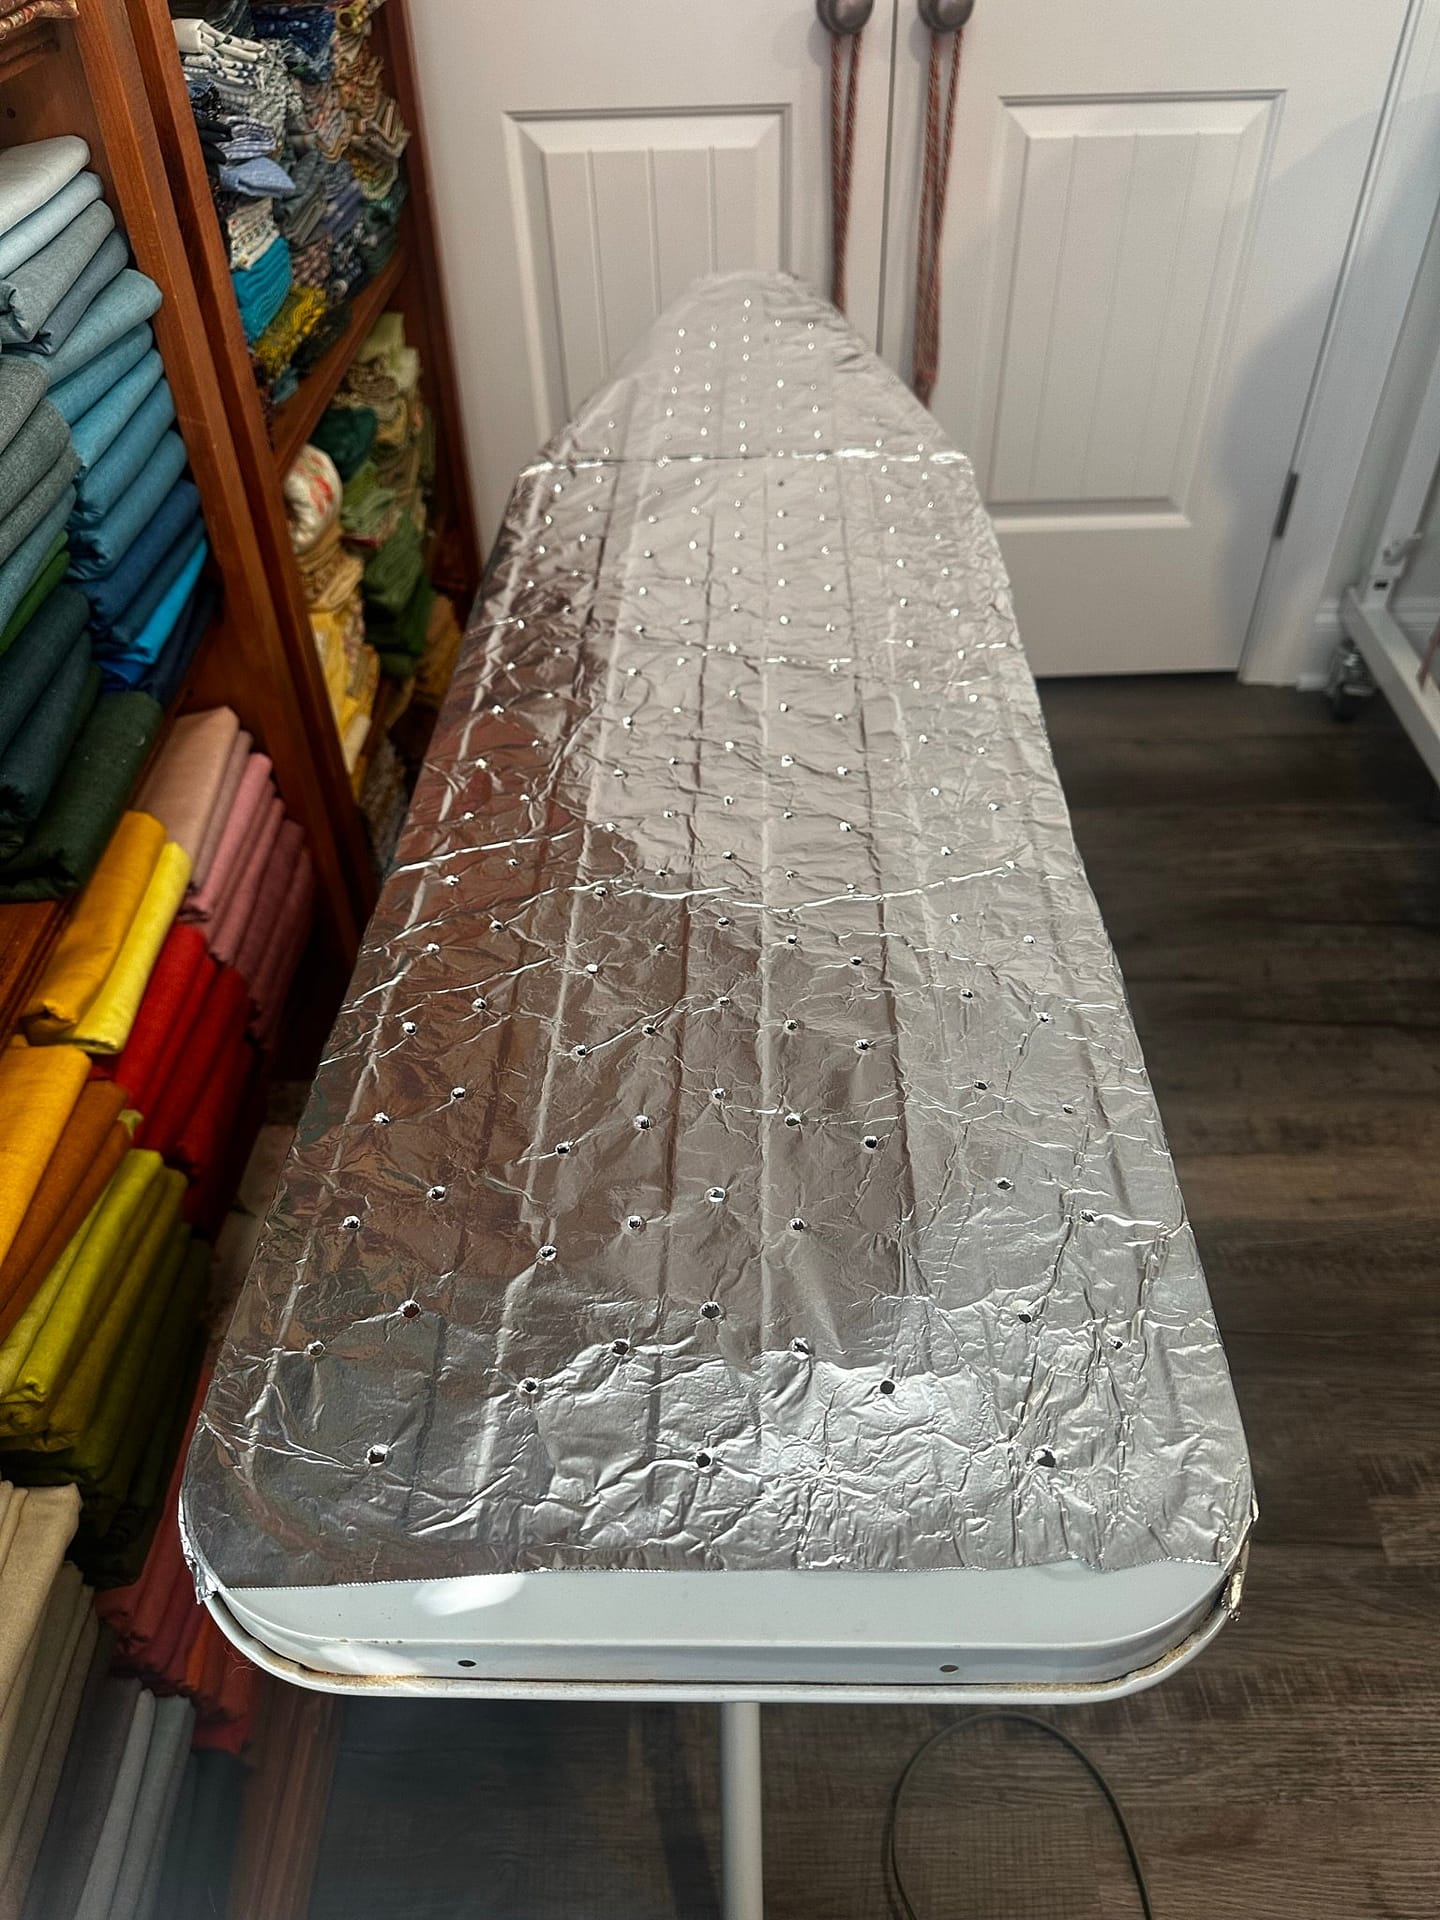
 The next step was to put a rust proof barrier on the table. My quickest option was aluminum foil. It doesn’t rust, is durable and pliable. I was lucky and had a wide roll on hand. I covered the table. Then, with a pencil, punched the holes into the foil to echo the ones in the table. These holes slow the fabric to breathe. However, I was careful to aim at the center and not make them to large. I didn’t want to give the rust a path back to my fabric.
The original cover was beyond hope. The rust stains were permanent, so after three plus decades, it is at the end. The second cover was in good shape. So I put that one back on the ironing board.
Now, I have a nice, clean surface for my work and a some confidence that my ironing board will last a while longer!
Have you given your ironing board a little TLC lately?

Happy Quilting!
Laureen
I have same issue but my ironing board is 70 years old, bubblegum pink with steam holes and the top and legs are one piece . No bolts,nuts, screws, nothing. The edge is 1.5 hem then a Quarter inch edge turns underneath so would love to re paint front and back but… Does the aluminum foil have to be replaced every so often. Is their something that can be purchased that would fit like a cover to the same? This goes a few inches to floor all the way up high, very high. Solid .It weights 14 pounds. I would love to save it , I use often as my mom did when she received it as a baby gift.
that sounds like a keeper! I have not had to replace the foil yet! I have not found a ready-made cover that will withstand the rust once you apply steam. Most fabric will eventually absorb the rust.
I would scrub the top of yours to remove some of the rust. Then, apply a sealing paint like Rustoleum. The aluminum foil could be layered on that just as a precaution, but you may not need it. And I would recommend purchasing a wool mat to put on your ironing board. Those are the best….
I appreciate your thoughts. I have been looking at an ironing board cover that has a few various layers one being wool. Do you feel it should be an individual piece of wool?
They sell thick pieces – about an inch that work really well. But if you are looking for a do it yourself solution, you could use thick wool batting or an old wool blanket doubled with a cotton cover.