What better way to describe 3-D appliqué than with pictures?
At its heart, 3-D appliqué is a way to add texture, depth, and visual interest to fusible appliqué projects — and solve one of the most common appliqué dilemmas at the same time:
How do I quilt this?
With traditional fusible appliqué, most of us fuse everything down first and then quilt around it — or quilt through it with edge-to-edge quilting. That works, but it can also limit how much texture, stitching, and embellishment we feel comfortable adding later.
With 3-D appliqué, the order shifts.
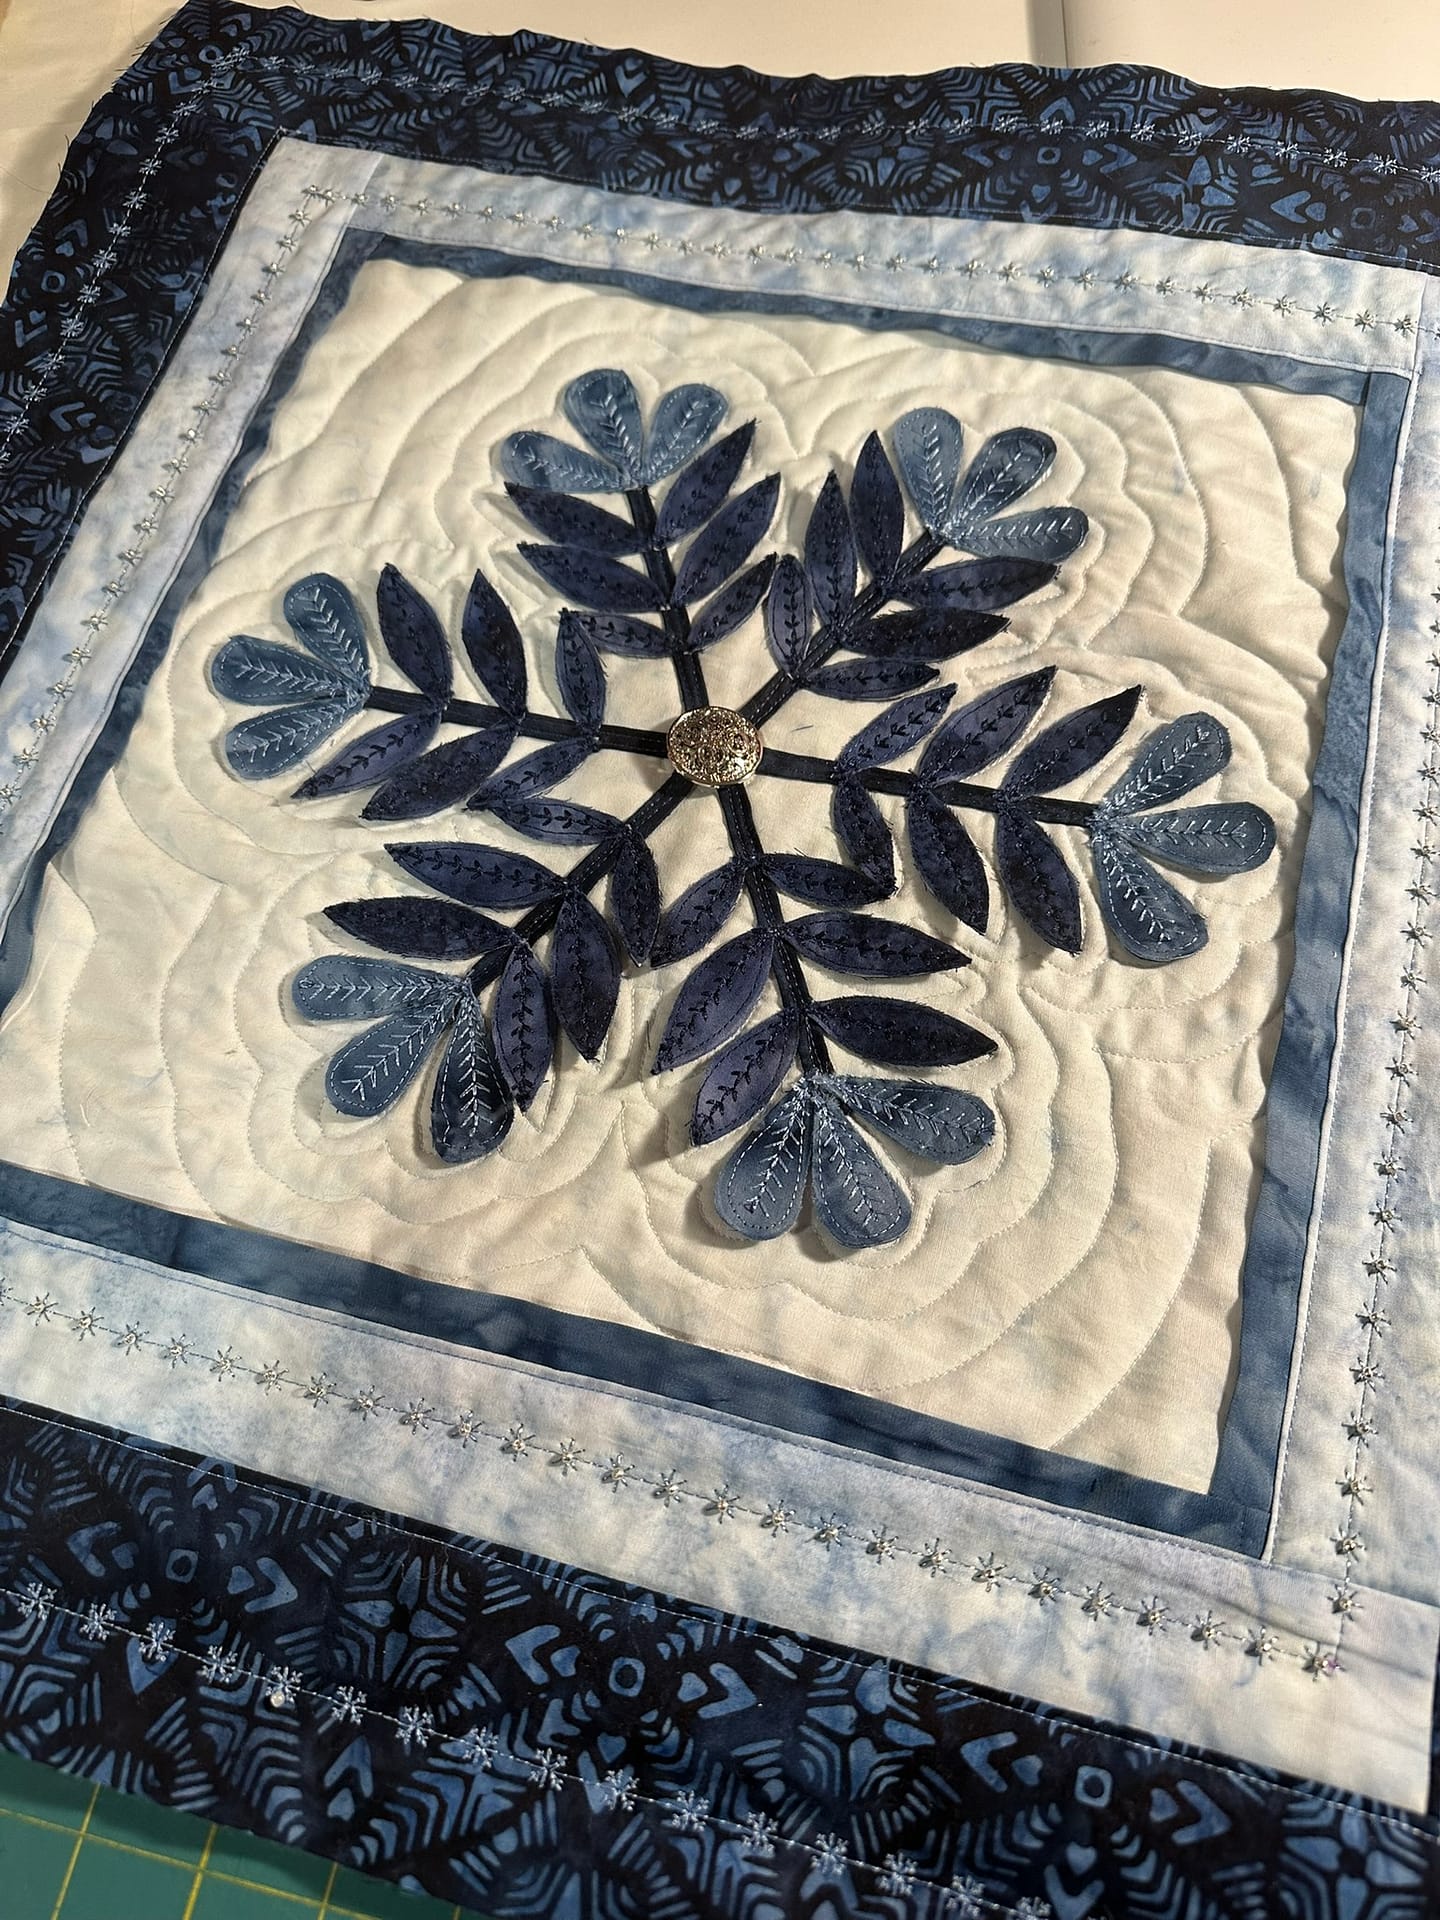
Frosted Branches – 3D version
Quilt First. Then Appliqué.
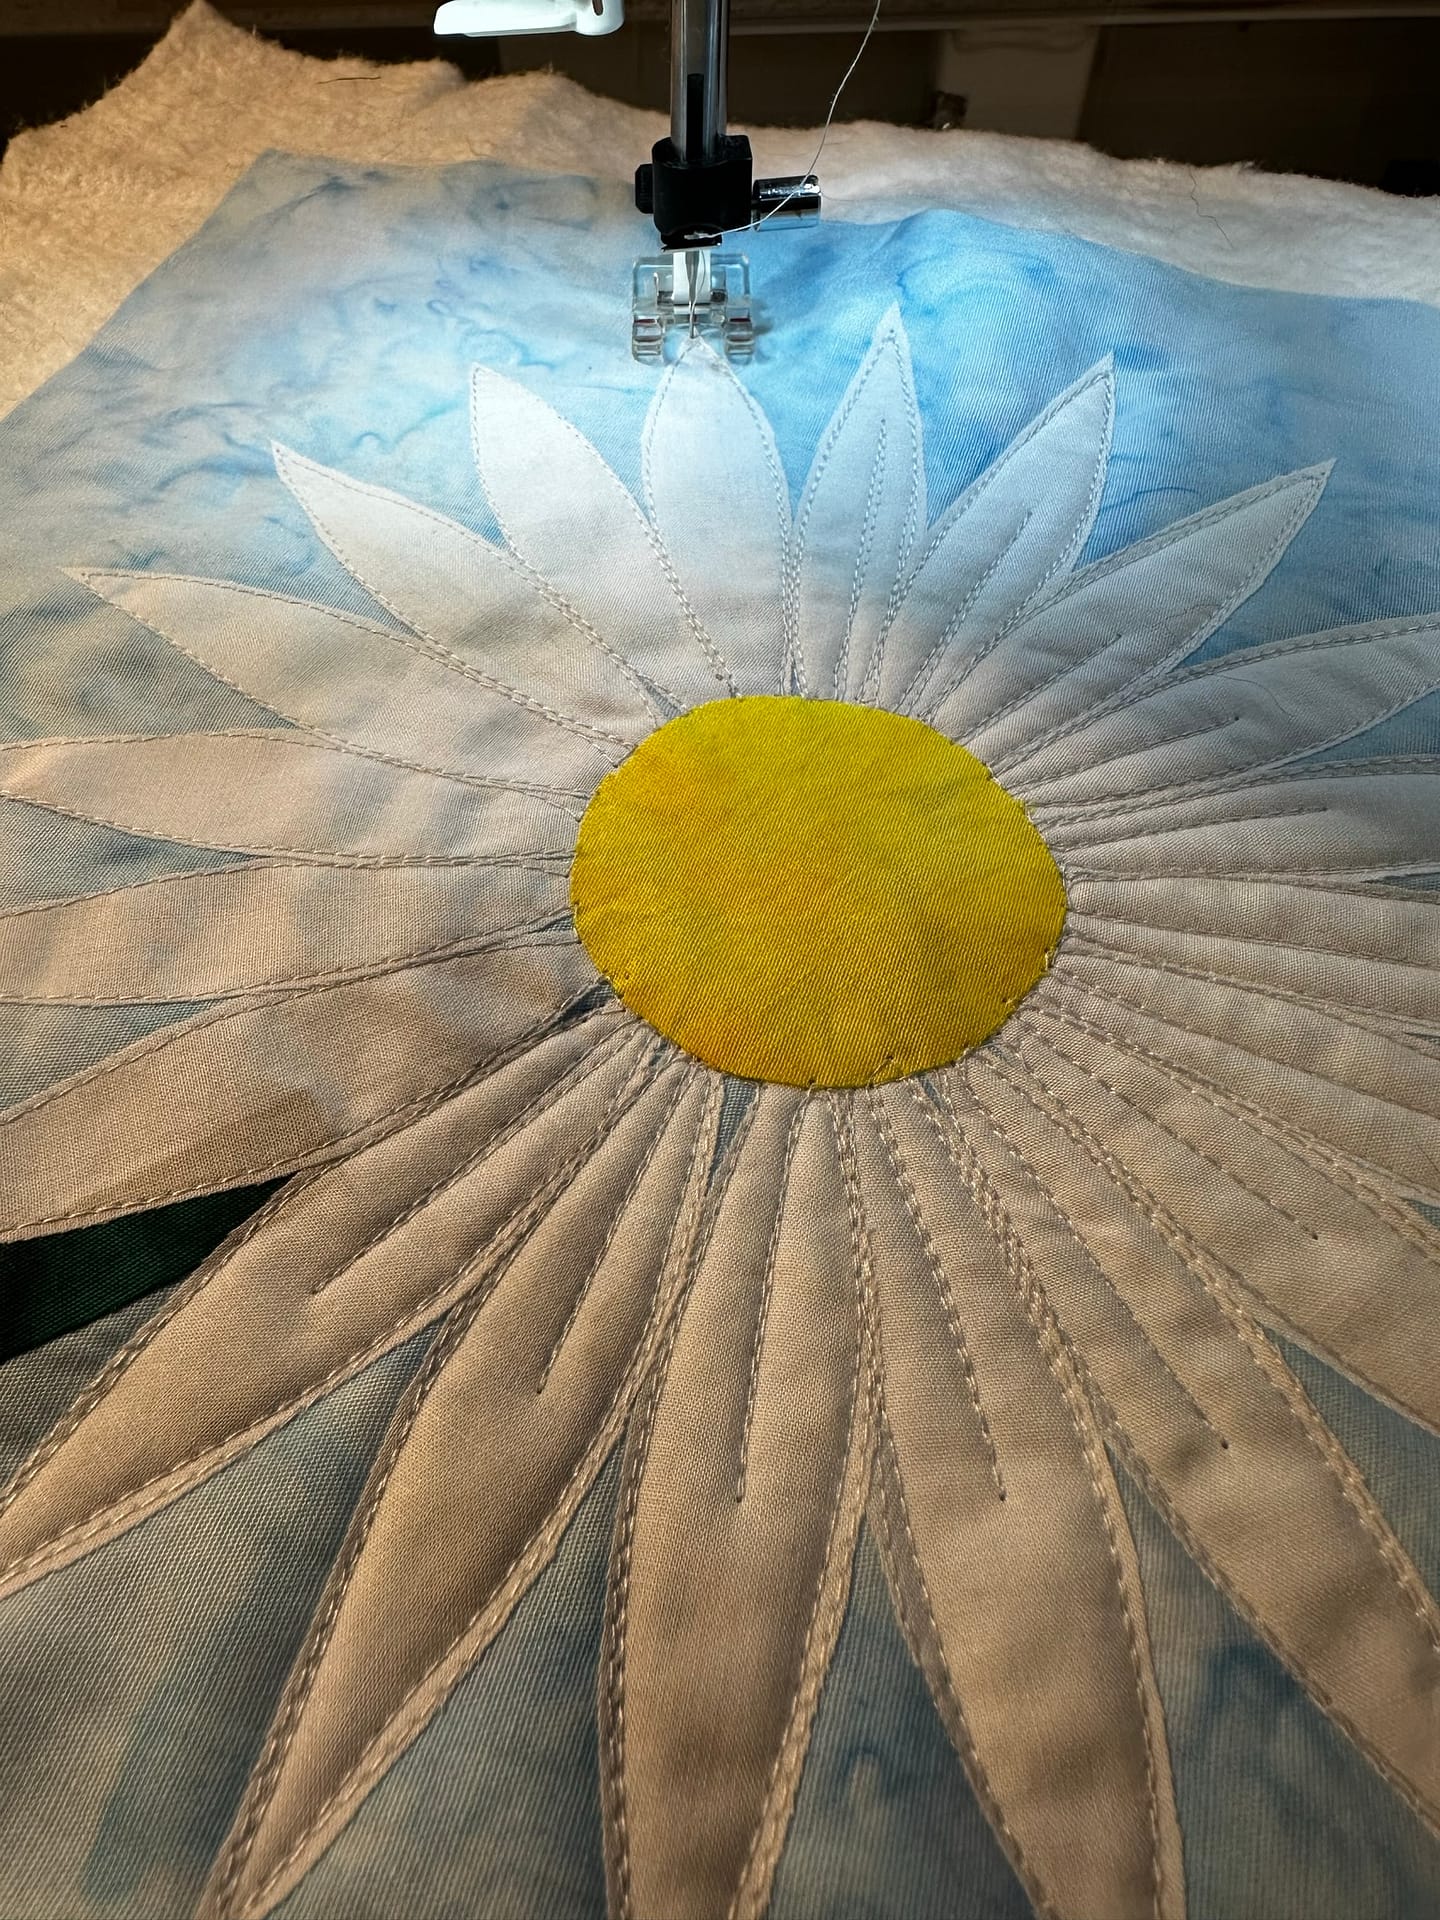
In a 3-D appliqué approach, the background is quilted before the appliqué pieces are added. The quilting creates subtle guidelines and texture that help with placement. Once the base is quilted, the appliqué elements are layered and stitched on top.
Because the quilting is already done, you can:
-
add texture freely
-
use decorative and specialty stitches
-
embellish without worrying about flattening everything later
It opens the door to more play — without adding stress.

Frosted Branches – Fused

Frosted Branches – Quilted
A Side-by-Side Look: Frosted Branches
Let’s take a look at Frosted Branches.
In the fused version, the tracing, cutting, and fusing were completed in an afternoon. The appliqué is flat and waiting for quilting.
In the same amount of time, I was able to quilt the background for the 3-D version and add borders — before a single appliqué piece was attached.
Same project. Same time investment.
Very different possibilities.
How This All Started
 This technique didn’t begin as a big idea — it started as a problem.
I was experimenting with fusible appliqué and struggling with shadowing when darker fabrics showed through lighter ones. While talking it through with my mom, she reminded me of something she’d taught me years ago:
Use interfacing.
The interfacing helped with shadowing and added texture — but it raised a new question:
How do I quilt this without flattening everything?
That’s when the engineer in me kicked in.
Instead of quilting after the appliqué, I quilted first. That one change solved the problem — and changed everything about how I approached appliqué.
I call this approach appliqué smithing, or Applismith — where appliqué becomes dimensional, textured, and far more flexible.
Want to Learn More?
If you’re curious about using quilting as part of the design process — rather than the final step — you can learn more about the Applismith approach here:
👉 Applismith: Where Appliqué Gets Dimensional
Whether you choose a traditional or dimensional path for a project, the goal is the same: quilting that feels intentional, creative, and enjoyable to make.

Hello,
My name is Kathy and I’m just beginning to quilt.
I’ll be wandering your website after the summit but wanted to say your work is really beautiful!. Thank you for the free pattern 🙂
Have a great week!
Thank you so much!! I am glad you started quilting. It is a wonderful way to meet great people when you want to be social. Or spend some good time by yourself making something beautiful.
Thank you so much!! Quilting is an incredible journey. Take your time, experiment, find your niche and enjoy!