I spend so much time on the tops of my quilts and the quilting, that sometimes I neglect the backing. Do you know what I mean?
I pick the fabric that kind of goes with the top and is the right size. Not much thought, just a mechanical step…
Well, a few of my quilty friends have inspired me be a little more thoughtful and creative in my choices.
Consider Color
You can coordinate the front and back fabric colors. Which is what most of us do…
But which colors and why? Take Holly Crossing as shown here. I had three simple options.
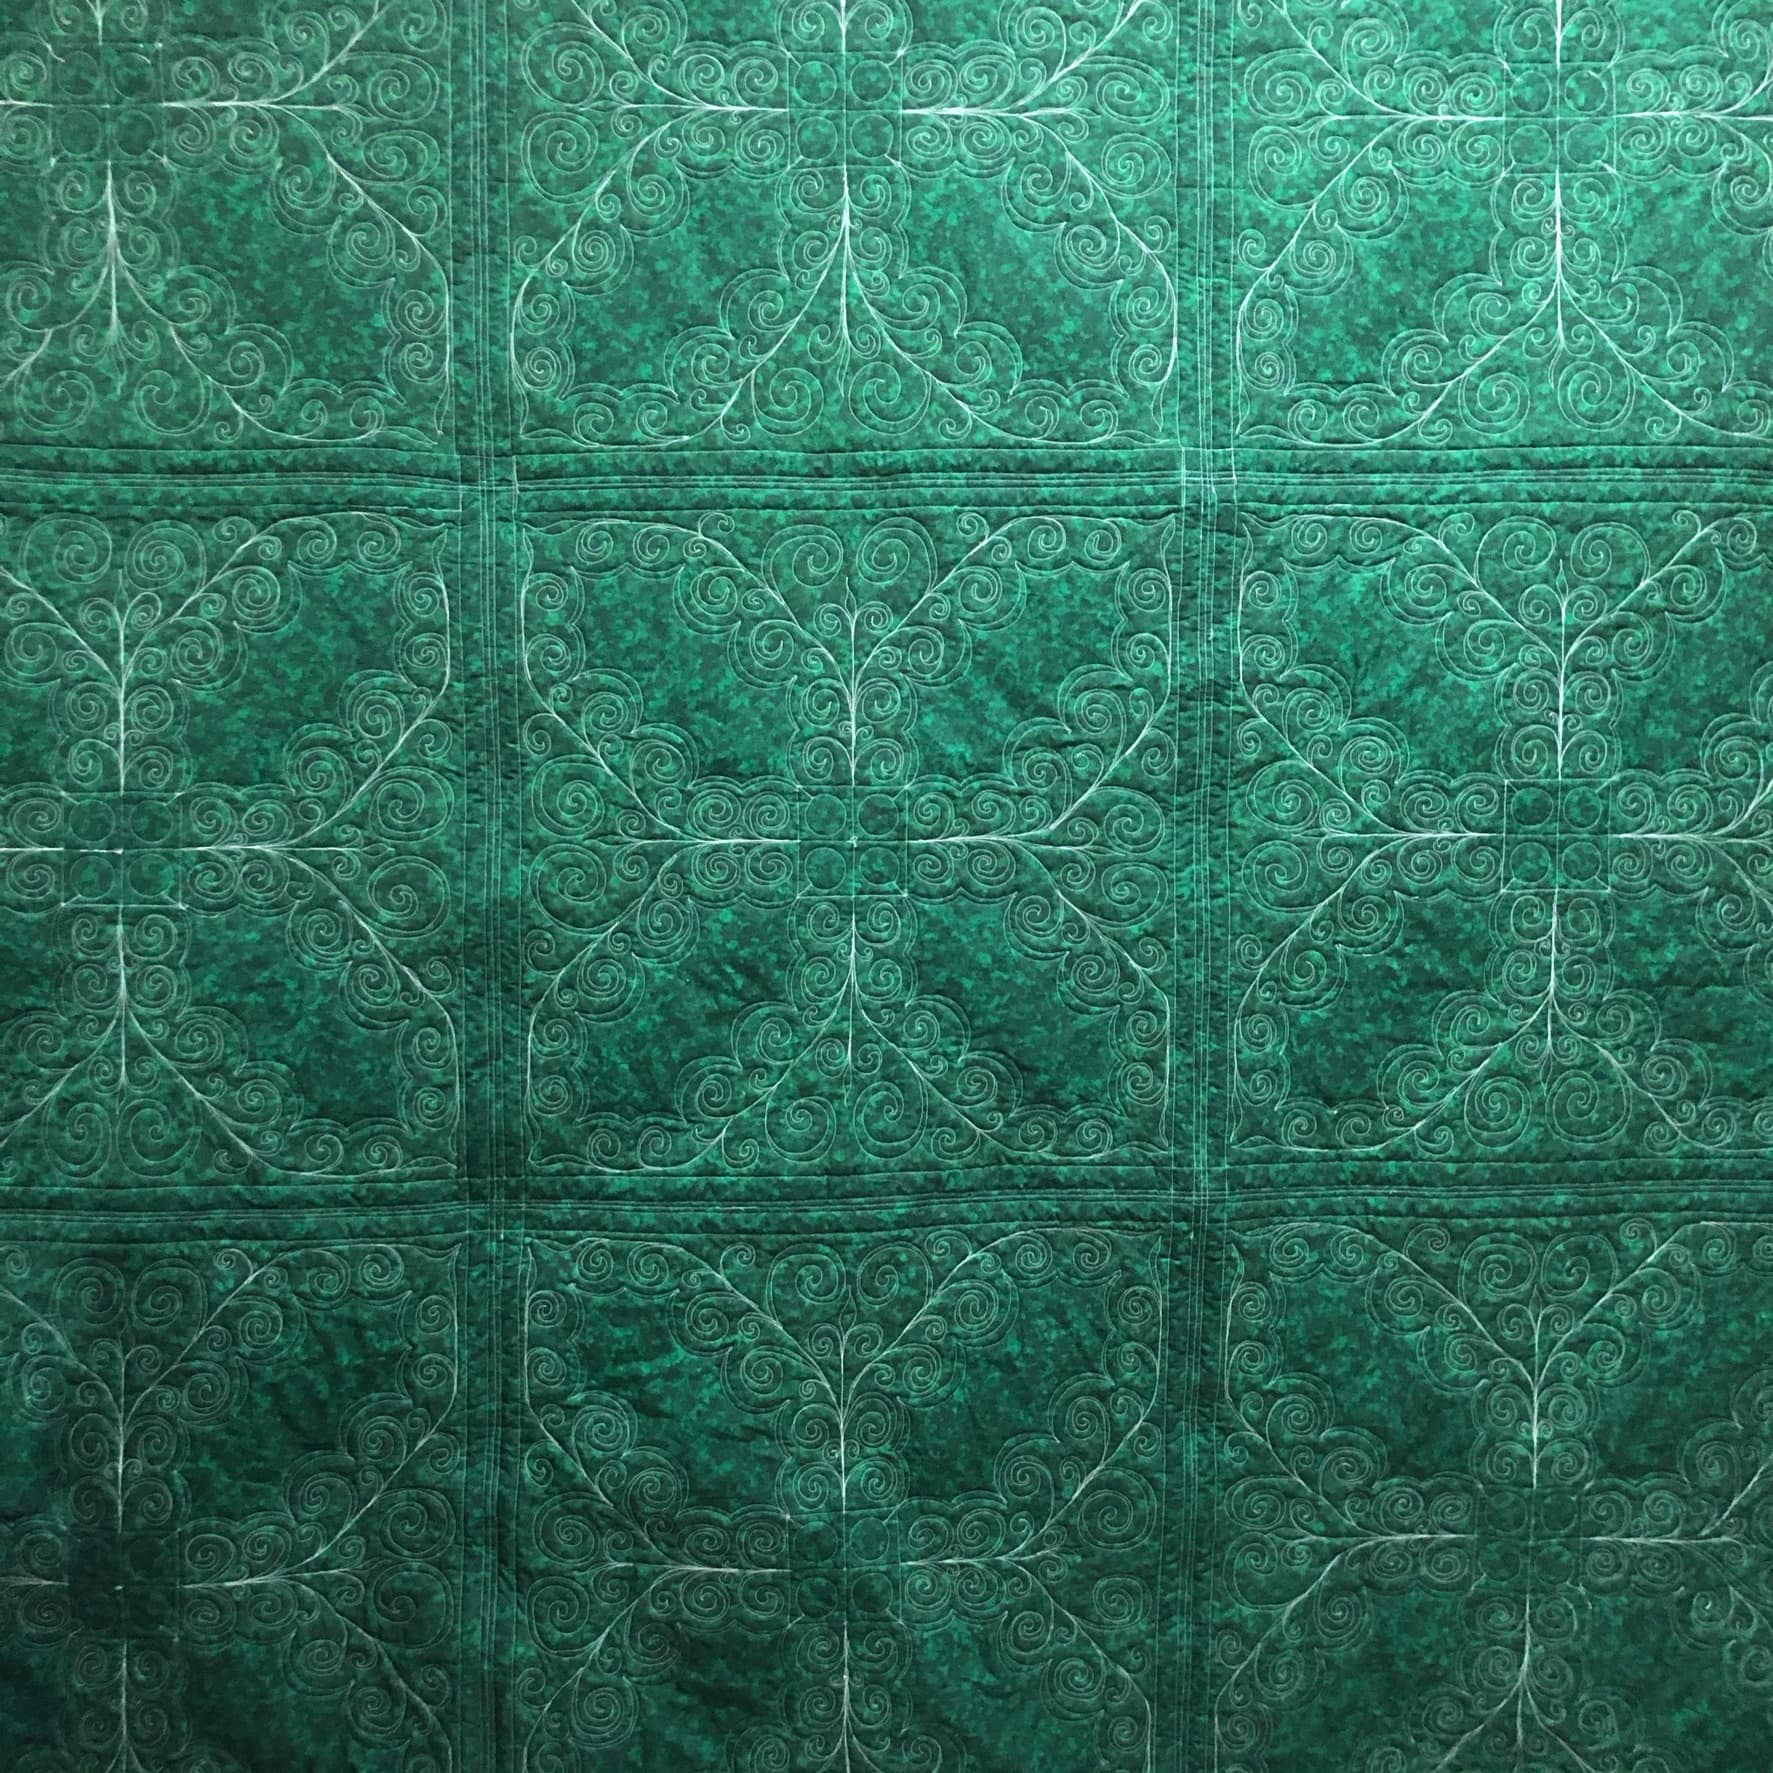
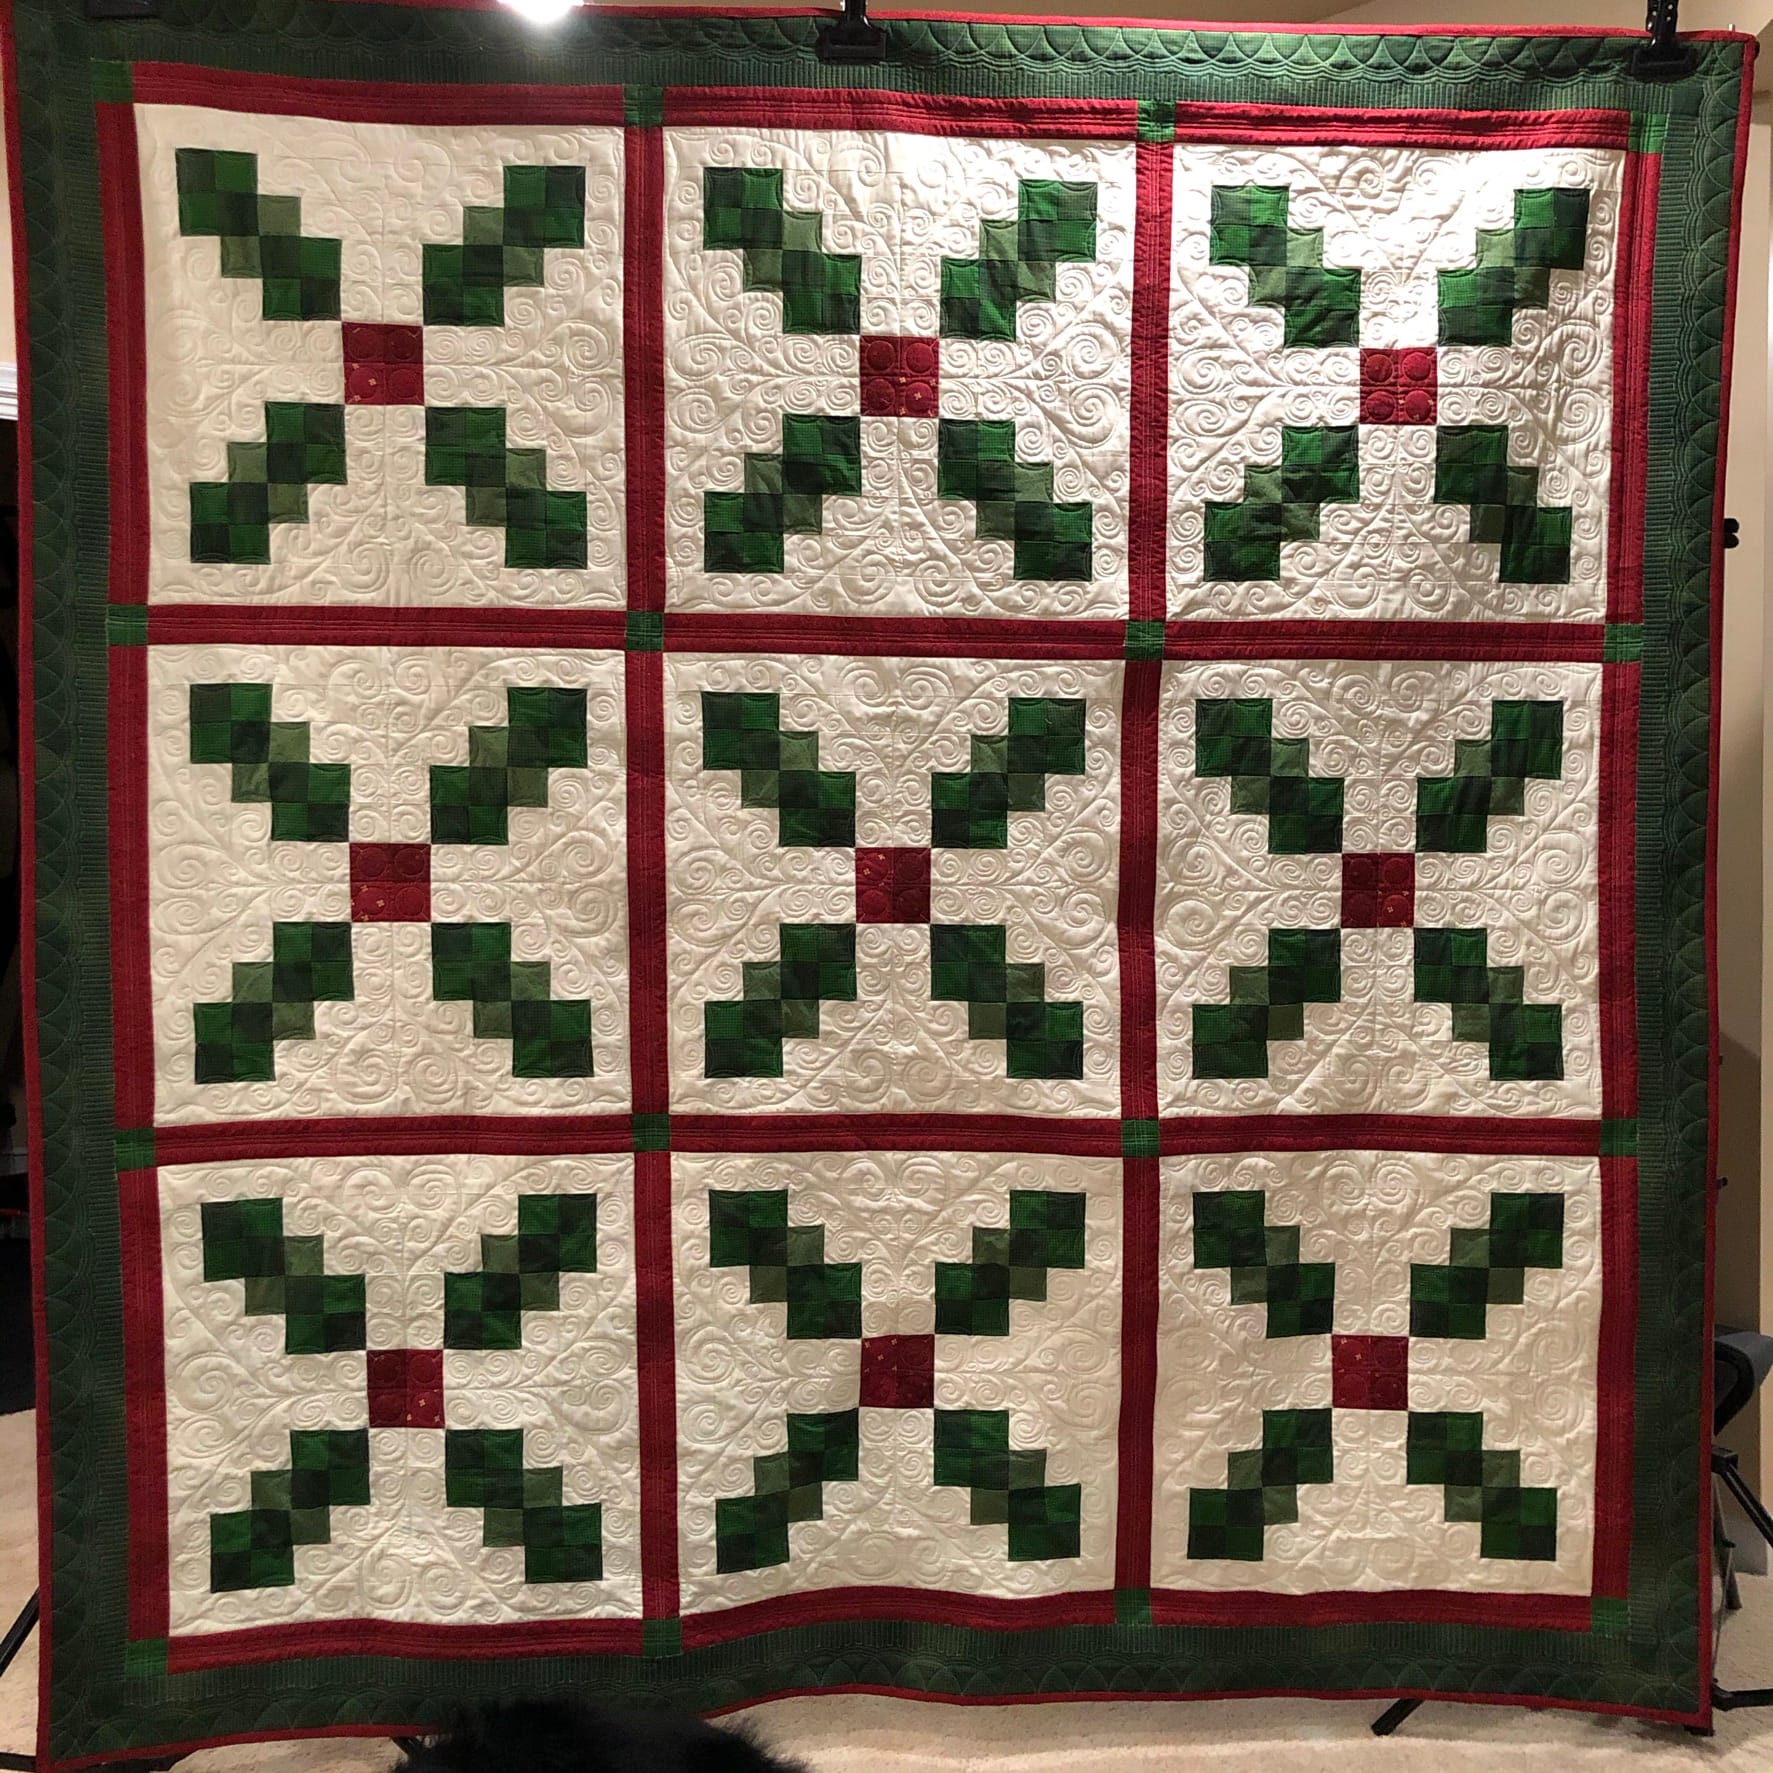
Green – This was an easy choice. I chose the green because it was the predominant color in the top and border. So green gave continuity. But I was also looking for contrast. I knew that I was going to use a light thread for quilting. Therefore, the green back would provide a good contrast with the light thread.
Red – This could have worked as well as the green. But I am a little gun shy around reds… I have had bleeding issues with them in the past. So, I use them carefully! By that, I mean I spend a lot of extra time ensuring the dyes are set before I use reds. I didn’t have a lot of time for this one….
White – This was a new thought for me. I typically choose dark backgrounds as the won’t show fur (yes Fergus and Rigby – the newfs – end up on everything). White would have been a really great option for two other reasons. First, light colored backs have less chance of “dulling” the top, especially if you use a thin layer of batting. Second, a light background would not have shown off my quilting as much.
Yes – that last point is really important. If you are not confident in your quilting, the back fabric and bobbin thread should be close in color. This will make any bobbles less noticeable. If you feel good about your quilting, show it off with a contrast between the fabric and the thread!
Scrap It Up
I joke about my stash as much as the next quilter. But there is the point when you hit SABLE – Stash Acquisition Exceeds Life Expectancy.
A good way to use up some of that stash in in your backing! You don’t need to by the wide back pieces every time…
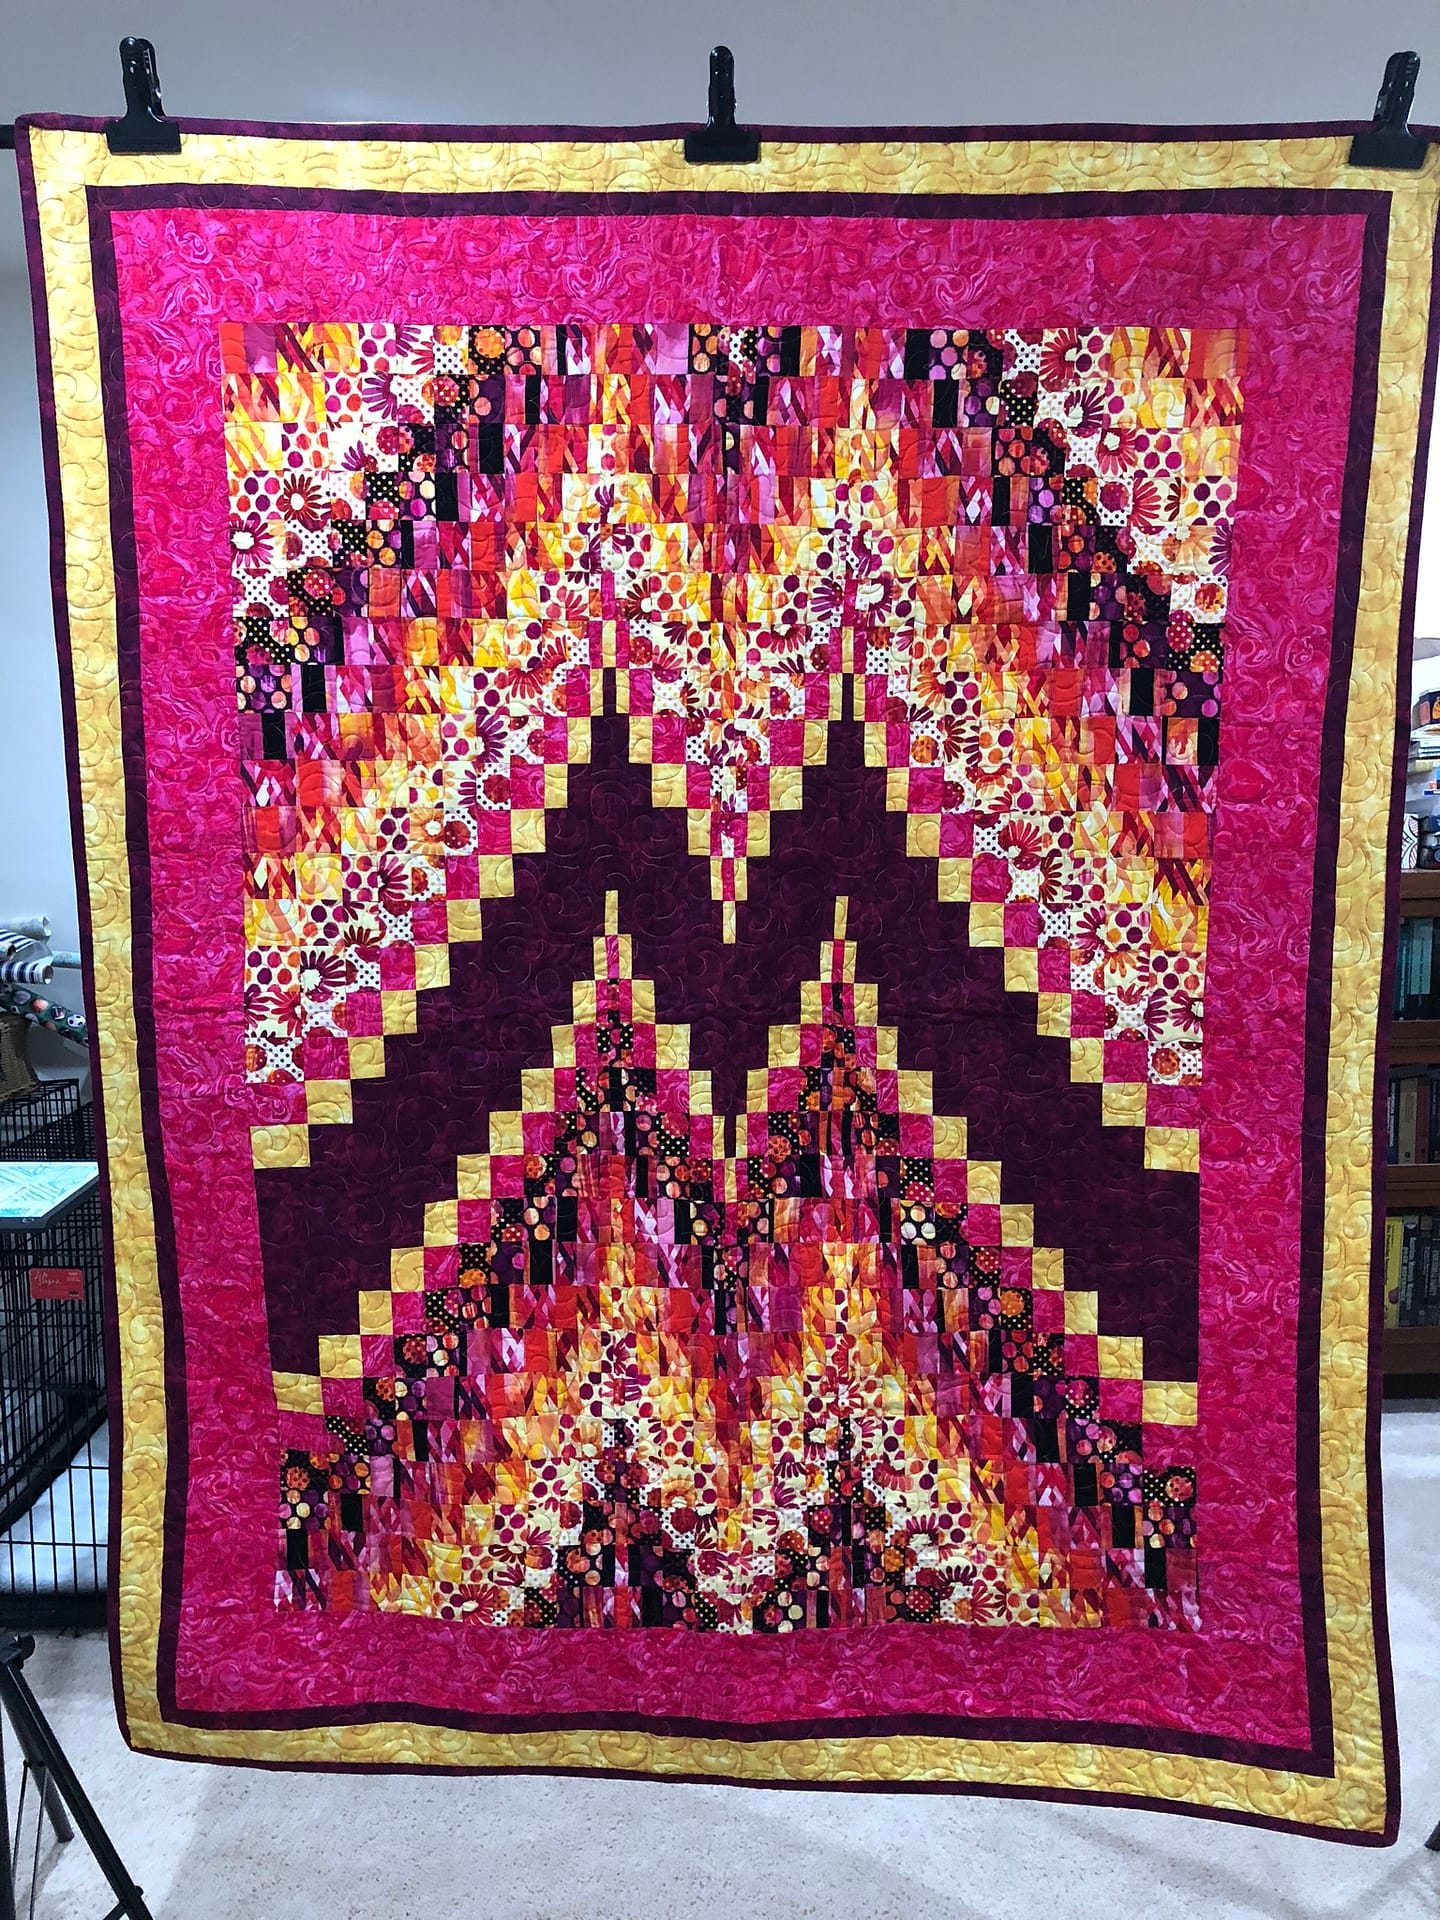
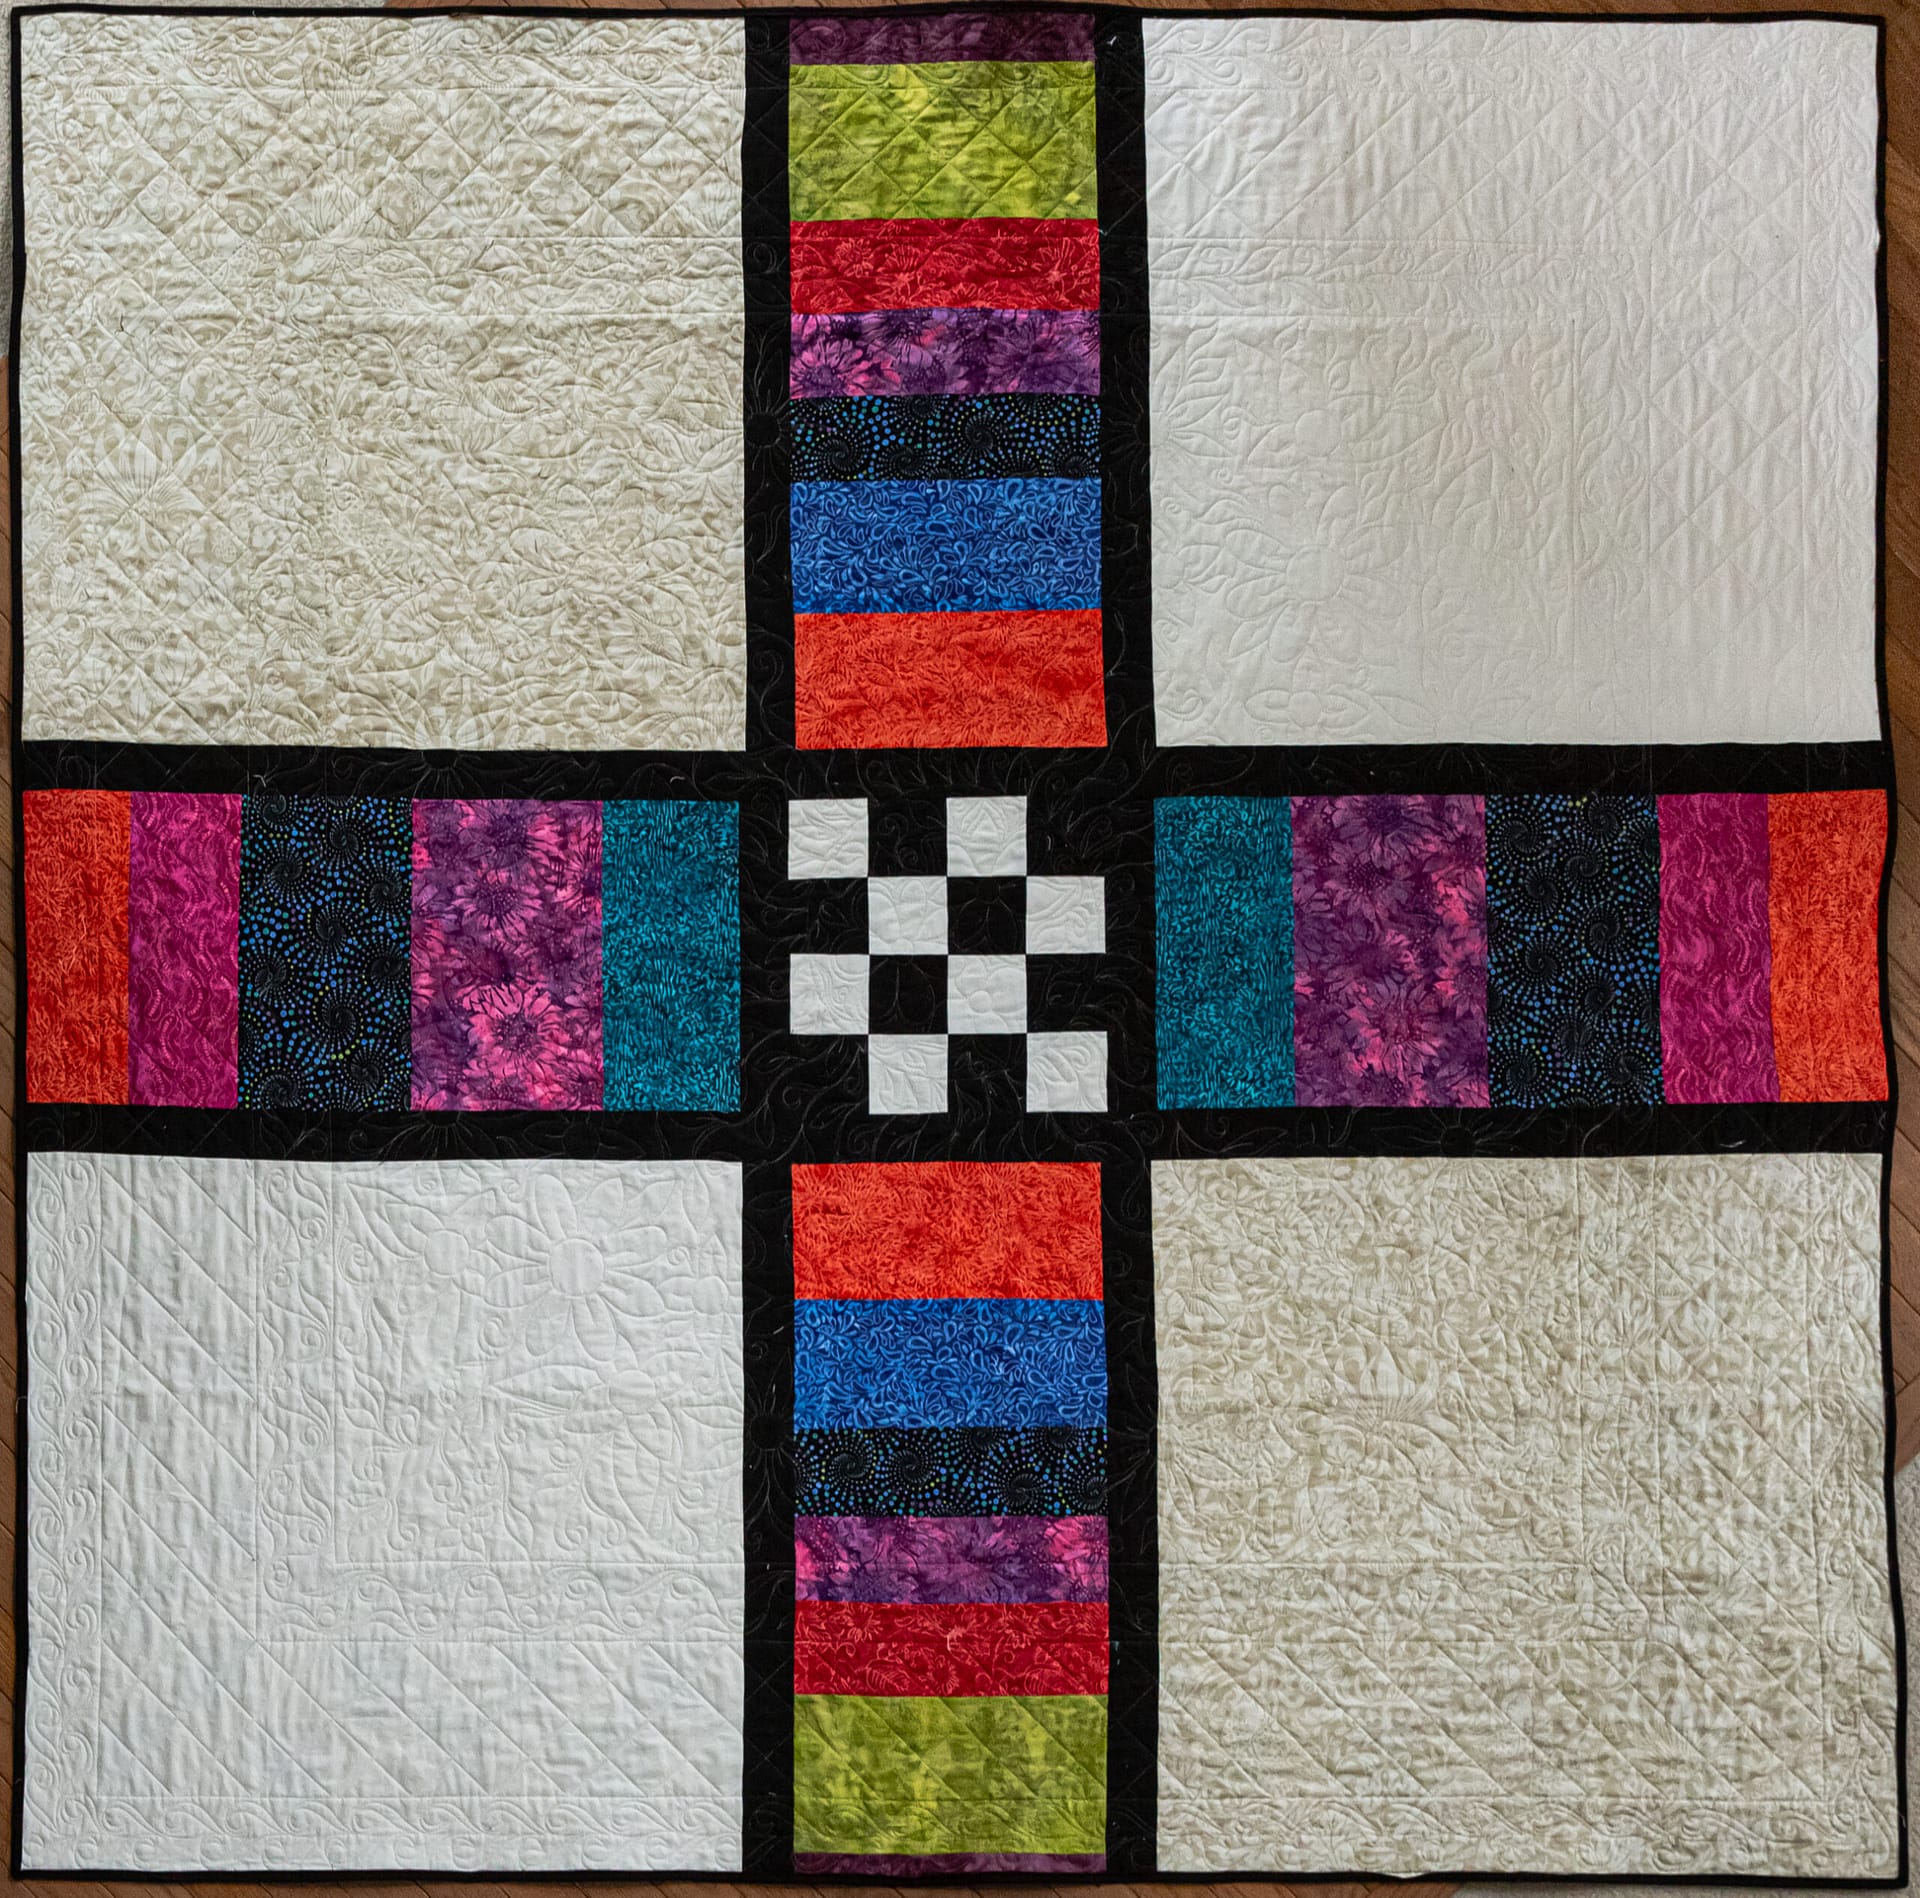
Here is an example. I made this bargello quilt for my niece, who was a diver a University of Minnesota. Her favorite color was pink. Combining the school colors and her favs, I made this quilt.
I had plenty of strips left, which I probably wouldn’t use again. There were three options. 1) Pitch the excess – a sin for most quilters. 2) Make a pillow or sham. But that was one more project for an already busy Christmas. 3) Use the excess for the back!
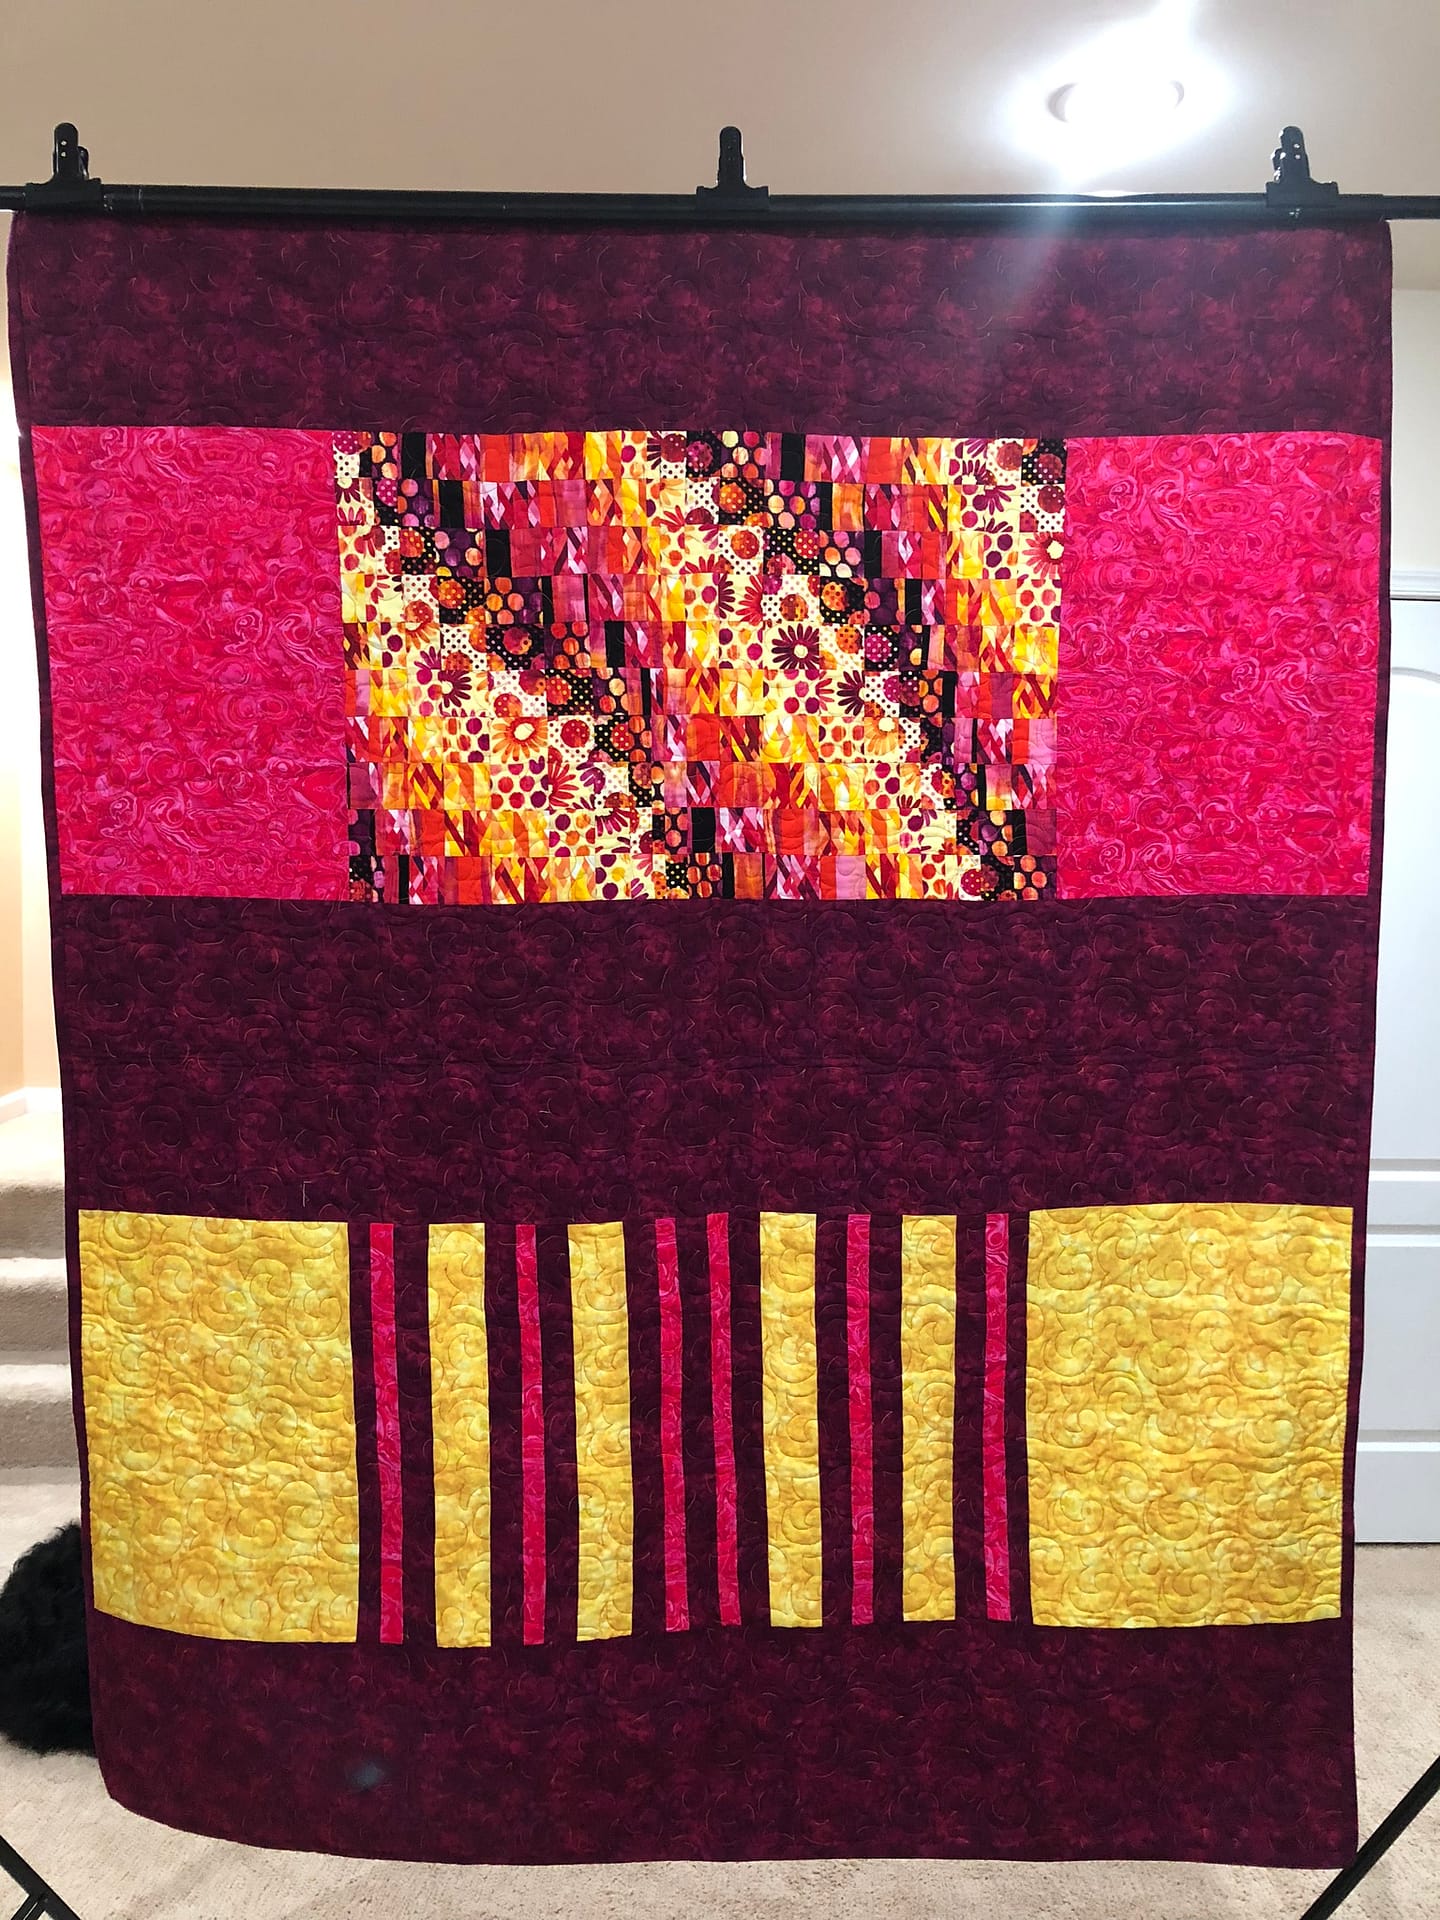
I am sure I could have come up with a little better layout. However, time was a ticking to get this done.
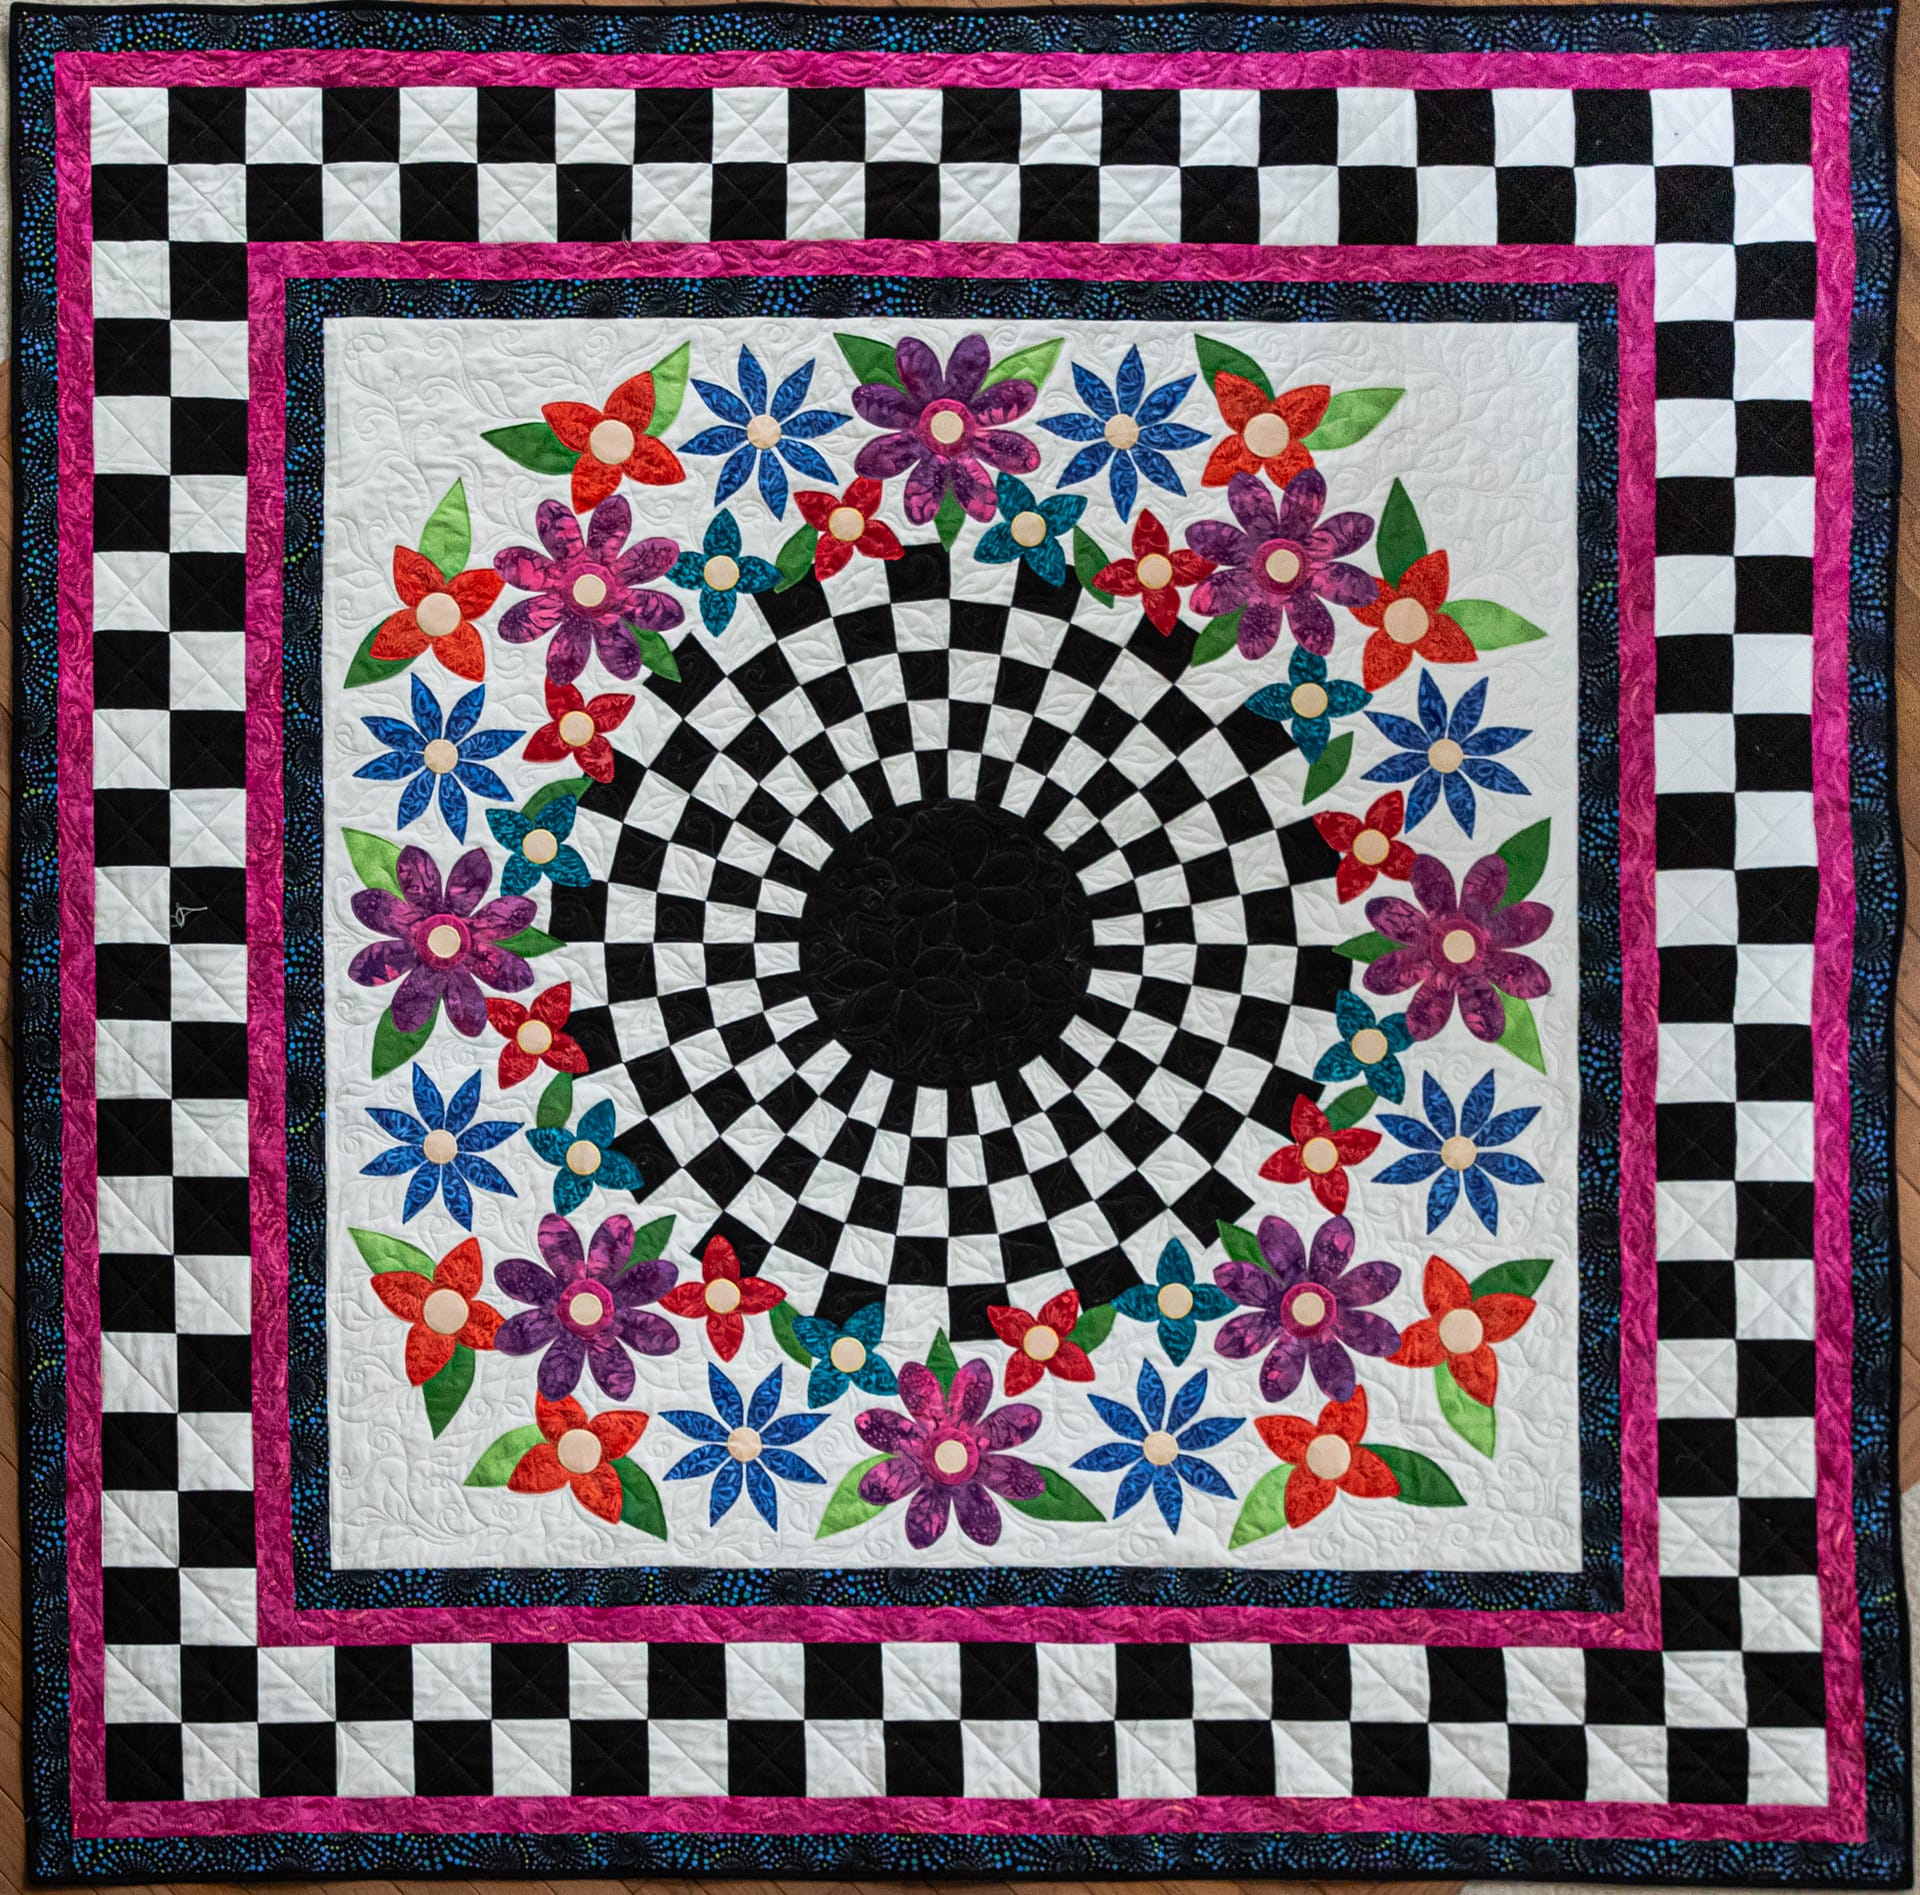
Here is another example from Pat Ferrara -one of my quilty friends. She was much more thoughtful in her use of extra fabrics for the Whimsy quilt. She created a complimentary design using extra fabrics from the appliques.
Keep It Soft
Are you looking for a standard backing with quilting cotton? That is great and it may require some piecing to get the right size. If so, make sure to match patterns if you can. This means it may take a little more fabric. But this is a nice soft option.
Wide backs may seem like a good option. But not all of them are created equal. Some are a little heavier weave, so may not be as soft as normal quilt cotton. Pre-washing helps so much with these.
Flannel, fleece and minky are option for keeping things soft. But these take a little extra care when working with them. Flannel looks great, but it will shrink at a much higher rate than quilting cotton. So, pre-wash is almost a must! Fleece and minky will wiggle and stretch more. Use a little fusible and go slow to keep these from wrinkling.
Other Options?
I haven’t tried this third method yet. It is on my bucket list. If you have tried it, please share photos.
The third method is to use a quilt top as the back. Yep – have two tops instead of one! In other words, reversible. This works well for seasonal quilts where you want to save a little time and space.
The trick here, of course, is to ensure they are the same size and to align them very carefully.
I would guess that borders are your friend there. They give you a little wiggle room to ensure all is square.
Your Favorite Method?
Please drop your favorite method in the comments. Pictures are great too!
This is one area where we probably don’t pay enough attention, so let’s start.
Happy Quilting!
